Are you interested in trying out woodworking but don’t have the space or budget to build full-sized furniture? Table top building is an enjoyable and rewarding DIY project, whether you’re looking to enhance your home with a custom made option or planning on crafting a tabletop for commercial use.

With the right preparation, materials, tools, and techniques it’s possible to create a table top that looks like it stepped out of an artisan furniture showroom. In this blog post, we will go through all the basics of building your own table tops so that you can start planning and constructing with confidence!
By following these simple steps on how to build table top, you will learn how to craft your own custom piece from start to finish. Keep reading for helpful tips on designing and constructing a purposeful, beautiful table top that will last the test of time and bring your décor dreams to life.
Things to Remember While Building Table Top
When building a table top, it’s important to remember the following:
1. Proper Measurement
Ensure that you have the correct measurements for your tabletop before starting. It’s best to measure multiple times, as there should be at least 1/16 of an inch between boards for expansion and contraction purposes due to seasonal changes in humidity.
2. Choose Quality Wood
For a longer-lasting tabletop, it is recommended to choose higher quality wood that has been kiln-dried before building. This process of drying ensures more consistent moisture content throughout the boards and reduces the chances of warping or cupping over time.
3. Type of Joinery
It is essential to choose the right type of joinery when assembling the tabletop together, as this will determine not only aesthetics but also the strength and durability of the table. Popular joinery techniques include pocket screws, dowels, butt joints, biscuits, and mortise-and-tenon.

The Benefits of Building Table Top
1. Skill Development
Building table tops is a great way to save money and express your style with custom furniture pieces. It also gives you the opportunity to learn new carpentry skills while creating something that will last long-term. Even if you’re just getting started in woodworking, table top building is a great beginner-friendly project that can help you gain more confidence and experience in the craft.
2. Sustainability
In addition to building skills by crafting something yourself, it’s also an environmentally conscious decision as you can find reclaimed lumber or locally sourced wood for your project. Doing this reduces the amount of wood that has to be harvested from forests, helping to protect our environment in the long run.
3. Cost-Effectiveness
Lastly, building a table top saves you money compared to buying one already made as you can source parts and materials yourself for a fraction of the cost. This includes not only wood but also the tools and hardware needed to construct the tabletop.
Required Items for Building Table Top
In order to build a tabletop, you will need the following items:
- Wood
- Sandpaper
- Table saw or circular saw
- Clamps and vice grips
- Jointer (optional)
- Router table (optional)
- Dowel jig (optional)
- Nail gun (optional)
- Drill
- Hammer
- Finishing supplies such as wood glue, finish, and screws
How to Build Table Top in 10 Steps
Step 1: Measure and Cut
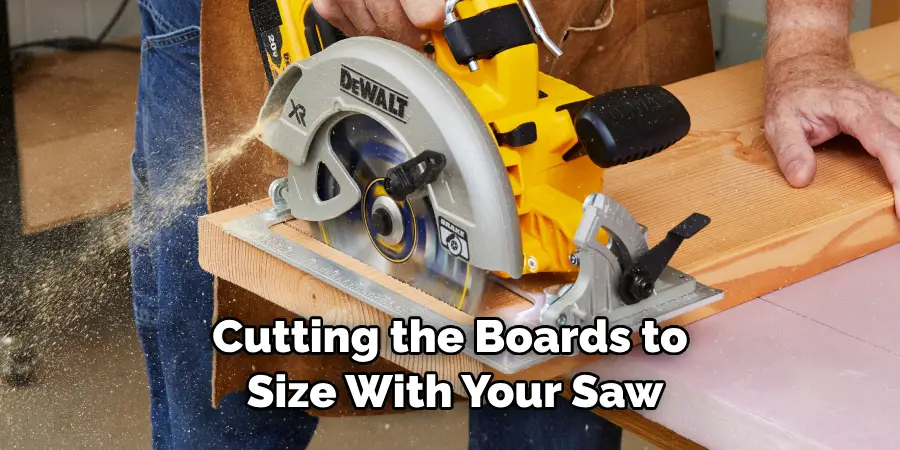
Start by measuring the dimensions of your desired table top and cutting the boards to size with your saw. You may also be able to purchase pre-cut boards in the size you need if available.

Step 2: Joint Edges (Optional)
If desired, use a jointer to make sure your boards are perfectly straight before proceeding with assembly. This will ensure that all edges line up and that there is an even surface for the tabletop.
Step 3: Sand
Sand all edges, corners, and faces of the boards with sandpaper. Start with a lower grit sandpaper (80-100) and work your way up to a finer grit for a smoother finish (180 -220).
Step 4: Glue Boards Together
Use wood glue to attach the boards together, making sure that they’re lined up and flush with one another. For extra strength, you can use a nail gun to secure the boards in place.
Step 5: Clamp Boards Together
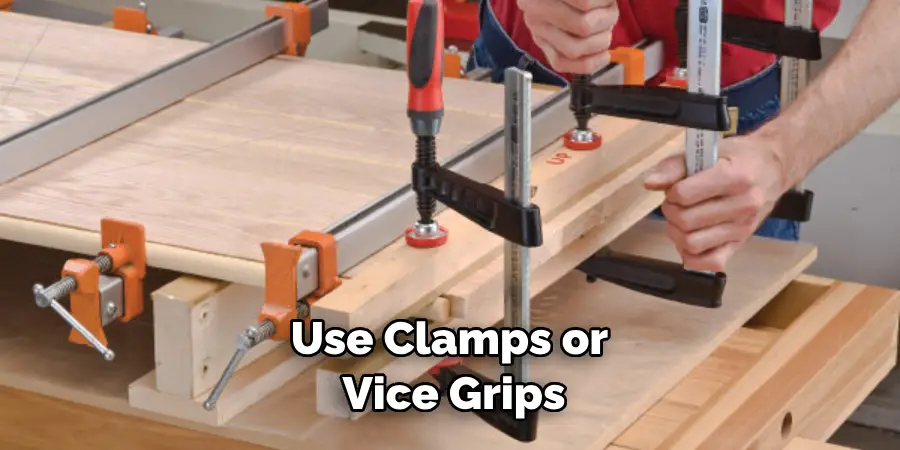
Use clamps or vice grips to keep the boards together tightly while the glue dries completely (at least an hour). Make sure that there is even pressure across the entire width of the boards.
Step 6: Measure for Router Table (Optional)
If you’re using a router table, mark and measure where it will be placed in order to get an exact fit. Measuring twice is recommended for accuracy.
Step 7: Router Table (Optional)
Use the router table to cut a groove in the boards, making sure that it’s level and even. This will allow the boards to fit snugly together and will not be visible from the top of the tabletop after assembly.

Step 8: Dowel Jig (Optional)
If desired, use a dowel jig for extra reinforcement when assembling the boards together. This will help to keep the tabletop structurally sound and prevent it from being weakened due to expansion or contraction.
Step 9: Assemble
Line up the edges of the boards and secure them together with wood glue and screws. Make sure that all edges are even and flush before proceeding to the next step.
Step 10: Finish
Using your desired finish, coat the tabletop in a protective layer. This will help keep moisture out while also giving it a beautiful sheen that will last for years to come.
With these tips on how to build table tops, you can take simple steps to craft your own custom piece from start to finish. Whether you are a beginner or experienced woodworker, building table tops is an enjoyable and satisfying activity that yields long-lasting results.
Plus, it’s more cost-effective and eco friendly than buying pre-made furniture. So, the next time you want to spruce up your home, why not build your own table top? You just may be surprised at what you create!
8 Tips for Maintaining Table Top
To keep your tabletop looking its best, here are some tips to ensure a long-lasting and beautiful finish:
- Avoid direct contact with water or other liquids as they can lead to warping, lifting or splitting of the wood. Avoiding direct contact with heat sources is also important.
- Use placemats and coasters when eating on the table to prevent staining or damage from spills. Also, avoid using harsh chemicals when cleaning the surface.
- Periodically inspect your table top for scratches or scuffs and use a fine grade sandpaper to buff them out if necessary. When sanding, make sure to use even strokes and work in the direction of the wood’s grain.
- To keep your tabletop looking fresh, periodically apply a thin layer of wax or polymer finish for extra protection. This will help protect against dust, spills, and general wear and tear.
- Make sure that the table top is kept away from direct sunlight or other heat sources that can cause discoloration over time.
- Move furniture, including your table top, around periodically to prevent indentations and uneven wear on the surface of the wood.
- Avoid using abrasive cleaning supplies as they can damage the finish of your tabletop. Use a soft cloth and mild soap to remove dirt or dust instead.
- If needed, lightly sand the tabletop every few years and reapply wax or finish to help restore its original shine. This will help keep your table looking beautiful for many years to come!

With proper care and maintenance, you can enjoy your hand-crafted tabletop for years to come. Building a table top from scratch is a rewarding and enjoyable experience, so why not give it a try? You may be surprised at the results!
How Much Will It Cost?
Building a tabletop can be surprisingly affordable! Depending on the material you choose, the basic cost of supplies for building a table top could range from $20 – $100. The most expensive part of DIY-ing a tabletop is typically labor – so if you don’t have carpentry skills or tools, it might be helpful to hire someone to help you out.
If you’re looking for a higher-end look, more specialized tools and materials may be required (such as CNC machines to cut the wood), but can still be relatively inexpensive compared to buying pre-made table tops.
Conclusion
Now that you have a better understanding of how to build the perfect table top, you can bring your vision to life. With the right tools and materials at hand, along with attentiveness in measuring and cutting pieces correctly –you’ll end up with a finished product that you are proud of.
Following the tips on how to build table top for maintaining your table top will ensure that it stands the test of time, allowing you to enjoy it for years to come.
When done properly, your DIY table top can be enjoyed by family and friends for years to come! Don’t forget to take pictures before, during, and after construction so you can show off your hard work! Finally, if all else fails or simply out of curiosity, designers of unique handmade furniture are also worth exploring as an option. Good luck building the perfect table top!


