Have you ever been faced with a wall of wood planks that have gaps in between them? Are you looking to upgrade the look of your home but don’t know where to start? While this unique design style certainly adds visual interest and texture to your interior, it can be challenging to fill the white space between each plank. Gaps in wood plank walls can be an eyesore, but luckily, they are quite easy to fix!
In this blog post, we’ll be exploring different methods on how to fill gaps in wood plank walls and provide tips on ensuring a smooth finish. You’ll have a complete and polished wall that’s ready for any decor style you desire! So if you’re ready to transform those pesky gaps into a thing of beauty, keep reading ahead!
What Causes Gaps in Wood Plank Walls?
Gaps in wood plank walls are usually caused by the natural expansion and contraction of the wood due to changes in humidity. The alternating planks can cause each plank to move slightly out of alignment, creating a gap over time. It will also depend on the type of wood and how it was installed.
The Bad Sides of Gaps in Wood Plank Walls
1. Compromise Elegance
Gaps in wood plank walls can be an unattractive sight, especially when they are large and noticeable. Not only that, but these gaps can also allow drafts to enter and make the room feel colder. It is important to fill these gaps in order to maintain the visual appeal of your home.
2. Decrease Energy Efficiency
Gaps between planks can also cause a decrease in energy efficiency, as warm air from inside your home can escape through the cracks, and cold air from outside can find its way in. This will result in higher energy costs due to your HVAC unit working harder to maintain a consistent temperature.
3. Not Safe for Children or Pets
Gaps in wood plank walls can pose a safety hazard, as children and pets can easily get their fingers or paws stuck in them while they are playing. It is important to fill these gaps as soon as possible in order to prevent any potential injuries.
Now that we know why it is important to fill the gaps in wood plank walls, let’s take a look at how we can do it!
Things to Consider Before Starting the Project
Before you start the project, there are a few things to keep in mind:
- Make sure that the wood planks are securely attached to the wall. If they’re not, it is best to reattach them before filling in any gaps.
- Measure the width of each gap and determine what type of material will be used for filling.
- Make sure that the area is well-ventilated and dust-free.
10 Tips on How to Fill Gaps in Wood Plank Walls
There are several different ways to fill gaps in wood plank walls, such as using wood filler or caulking. Here are some of the most popular methods:
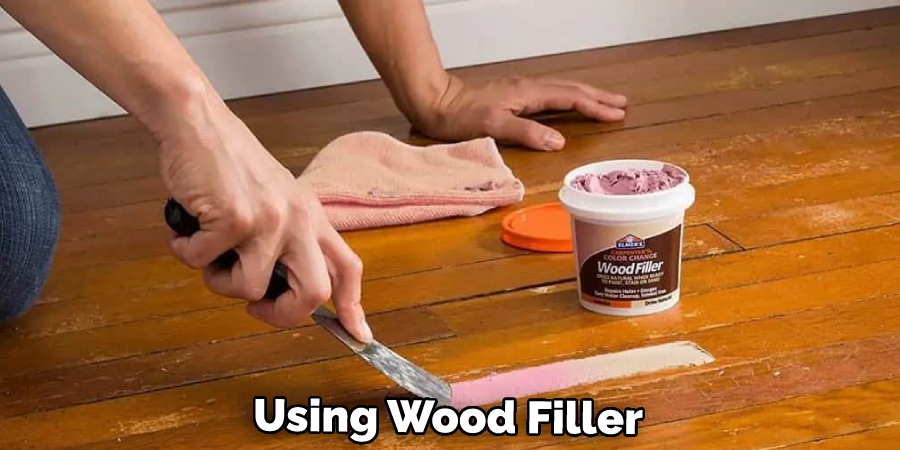
1. Wood Filler
Wood filler is one of the most popular materials for filling gaps in wood plank walls. It comes in a variety of colors and can be sanded down once it has dried for a smooth finish. It will be long-lasting and provides a great natural look.
2. Caulking
Caulking is another good option for filling gaps in wood plank walls. It comes in many colors and can be easily applied with a caulking gun or a brush. Once dry, it creates an airtight seal that will last for years to come.
3. Wood Putty
Wood putty is a quick and easy way to fill gaps in wood plank walls. It can be easily applied with a putty knife and comes in many different colors to match the existing wall color. The drying time of this material can vary, so make sure you read the instructions carefully before applying it.
4. Wood Glue
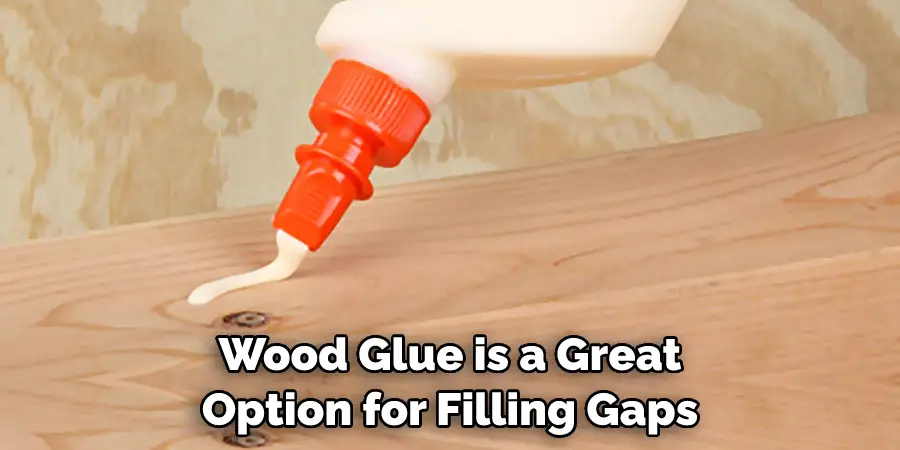
Wood glue is a great option for filling gaps in wood plank walls, as it provides a strong bond that will last for years. Make sure to use waterproof wood glue so that the gap won’t be affected by changes in humidity or moisture.
5. Latex Caulk & Paintable Latex Caulk
Latex caulk and paintable latex caulk are also great options for filling gaps in wood plank walls. These materials are easy to apply and will provide a waterproof seal that can be painted over once it has dried.
6. Wood Shims
Wood shims are a good option for filling large gaps in wood plank walls. They are easy to install and can be cut to size, making them a great solution for uneven surfaces.
7. Plastic Gaps Filler
Plastic gaps filler is another good option for filling gaps in wood plank walls. It is available in different colors and sizes and is perfect for small or narrow gaps. Plastic gaps filler can be easily applied with a caulking gun and offers a long-lasting solution.
8. Expanding Foam
Expanding foam is an effective way to fill larger gaps in wood plank walls. It is easy to apply and provides a waterproof seal that will last for years. However, it should not be used on surfaces that will be painted, as the foam can prevent paint from adhering properly.
9. Drywall Compound
Drywall compound is another great option for filling gaps in wood plank walls. It is easy to apply and provides a smooth finish that can be easily painted over once dry. However, it should not be used on surfaces that will be exposed to water, as it is not waterproof.
10. Wood Strips
Finally, wood strips are a great option for filling thin gaps in wood plank walls. They can be easily cut to size and offer a natural look that is perfect for interior design projects.

These are just some of the many different ways to fill gaps in wood plank walls. Make sure to read the instructions carefully before starting your project, and be sure to use the right materials for the job. With a little bit of patience and effort, you can create a beautiful wall that will last for years.
8 Safety Precautions to Take When Filling Gaps in Wood Plank Walls
When it comes to filling gaps in wood plank walls, safety is of the utmost importance. Before you begin any repairs or renovations, make sure you’re prepared and take these 8 safety precautions:
1. Wear protective gear always. Make sure that you’re wearing the necessary protective gear, such as safety goggles, gloves, and a dust mask, before you handle any materials.
2. Read the labels of all materials. Make sure that you read the labels on the products you are using to fill the gaps in your wood plank wall. This will ensure that you are using the right products for the job (and that they are safe to use).
3. Keep the area well-ventilated. Make sure you open windows or doors in the room where your wood plank wall is located so that there’s enough fresh air while you work. Ventilation is important to avoid inhaling any potentially dangerous fumes.
4. Follow the instructions for your products. Follow the instructions as stated on the labels of your various filling materials and solutions, including how long you need to wait for them to set or dry before continuing with your work.
5. Make sure there are no flammable items nearby. Make sure that there are no flammable items near your work area, especially in the vicinity of any open flames or sparks. It will avoid any potential accidents.
6. Don’t rush through the process. Take your time and make sure that you do the job correctly, whether it is filling gaps in wood plank walls or other types of repairs. Rushing may result in mistakes and improper results.
7. Keep children away from the work area. If you have kids, keep them in another room and warn them not to come near your work area. This will ensure that they are safe while you’re busy with repairs or renovations.
8. Clean up after yourself when finished. Make sure that you clean up any mess before you put away your tools and materials. This will prevent any potential accidents from happening.
Following these 8 safety precautions when filling gaps in wood plank walls will go a long way in ensuring that the job is done safely, properly, and with minimal risk of injury or harm.
Conclusion
Filling gaps in wood plank walls is a great way to make them look better and last longer. Through patching, smoothing, caulk-filling, and sanding, achievable with the help of an electric sander or plane tool, most gap repair jobs can be done relatively quickly and easily. The finished product can make a big difference in both the appearance and functionality of your wall.
Additionally, treating your wood planks in their right forms protects them from extensive damage or wear that could occur if left exposed to the elements. All it takes is patience and some plausible solutions, as mentioned in this post on how to fill gaps in wood plank walls to complete the task correctly, so go ahead and get started today!

