Are you about to paint your kitchen cabinets but dread the thought of taking them all apart and putting them back together? Fear not! This tutorial will show you how to tape cabinets for painting in just a few simple steps. This will help protect your walls and cabinet surfaces from paint drips and splatters. So let’s get started.

Summary: To tape cabinets for painting, use painter’s tape and a level. First, mark the height of the cabinet from the floor. Then, measure the width of the cabinet and mark that off on the tape. Next, line up the top of the cabinet with the tape and make sure it’s level. Finally, attach the tape to the cabinet by pressing down firmly.
What Causes Paint to Peel Off Cabinets?
One of the most common problems people run into when painting cabinets is to paint peeling off soon after they’ve applied it. This is usually caused by not properly preparing the surface before painting. If there is any grease, dirt, or grime on the cabinets, the paint will not adhere properly and eventually start peeling. So it’s important to clean the cabinets thoroughly before beginning any painting project.
Another common cause of paint peeling is applying the paint too thickly. When the paint is applied too thickly, it doesn’t have time to adhere to the surface before it starts to dry properly. This can also cause paint to crack and chip off soon after it’s applied. So it’s important to use thin, even coats of paint when painting cabinets.
Another problem that can cause paint to peel off cabinets is not allowing enough time for the paint to dry between coats. If you apply a second coat of paint before the first coat has had a chance to dry properly, the paint will not adhere properly and will start to peel. So be sure to allow plenty of time for the paint to dry before applying a second coat.
Why You Should Tape Cabinets Before Painting
There are a few reasons you should tape cabinets before painting them. One reason is to avoid getting paint on the surfaces of the cabinets that you don’t want to be painted. This includes the inside surfaces of the cabinets, as well as the hardware. Taping off these areas will help ensure that only the areas that you want to be painted are actually painted.
Another reason to tape cabinets before painting them is to avoid drips and splatters. Taping off the areas around the cabinets will help to catch any drips or splatters so that they don’t end up on your walls or floor. This is especially important if you’re using a dark paint color, as drips and splatters will be much more noticeable on light-colored surfaces.
Finally, taping cabinets before painting them will help to create clean, sharp lines. When you paint without taping, it isn’t easy to get clean, straight lines. Taping off the edges of the cabinets will help you create sharp, clean lines that will give your cabinets a professional-looking finish.

Step by Step How to Tape Cabinets for Painting
1. Gather Your Supplies
Before you begin, you’ll need to gather a few supplies. You’ll need painters’ tape, a drop cloth, and a screwdriver. You may also need a putty knife if your cabinets have any decorative molding. Gather all of your supplies before you begin so that you don’t have to stop in the middle of the project to run to the store.
If you’re not sure what type of painters’ tape to use, we recommend a medium-adhesion tape. This type of tape will adhere well to most surfaces without causing damage.
2. Remove Cabinet Doors and Drawers
The first step in how to tape cabinets for painting is to remove the cabinet doors and drawers. Most cabinets have screws that hold the doors and drawers in place. Before taking the doors and drawers off, you’ll need to remove these screws with a screwdriver. Once the screws are removed, the doors and drawers should come right off.
You can try tapping them lightly with a hammer to loosen them if they’re stuck. If they still don’t budge, you may need to use a putty knife to pry them off. Once the doors and drawers are removed, set them aside in a safe place.
3. Clean the Cabinets
Once the doors and drawers are removed, it’s time to clean the cabinets. If there is any grease or dirt on the cabinets, the paint will not adhere properly and eventually start peeling. So it’s important to clean the cabinets thoroughly before beginning any painting project. Use a mild soap and water solution to clean the cabinets. First, rinse the cabinets with plain water to remove any loose dirt.
Then, use a sponge or clean cloth to wipe the cabinets with the soap and water solution. Rinse the cabinets again with plain water to remove any soap residue. Finally, use a clean cloth to dry the cabinets completely. You can also use a degreaser if there is a lot of grease build-up.

4. Remove Hardware
The next step is to remove any hardware from the cabinets. This includes knobs, handles, and hinges. Most hardware is attached with screws, so you’ll need to remove these screws with a screwdriver. Once the hardware is removed, set it aside in a safe place. If you’re planning on reusing the hardware, label it, so you know which piece goes where.
5. Fill in Holes and Imperfections
Once the hardware is removed, you’ll need to fill in any holes or imperfections in the cabinets. This includes holes from the hardware as well as any dents or scratches. You can use wood filler, putty, or caulk to fill in these holes and imperfections. First, use a putty knife to apply the filler to the hole if you’re using wood filler. Then, use your finger or a wet rag to smooth out the filler. Allow the filler to dry completely before moving on to the next step.
6. Sand the Cabinets
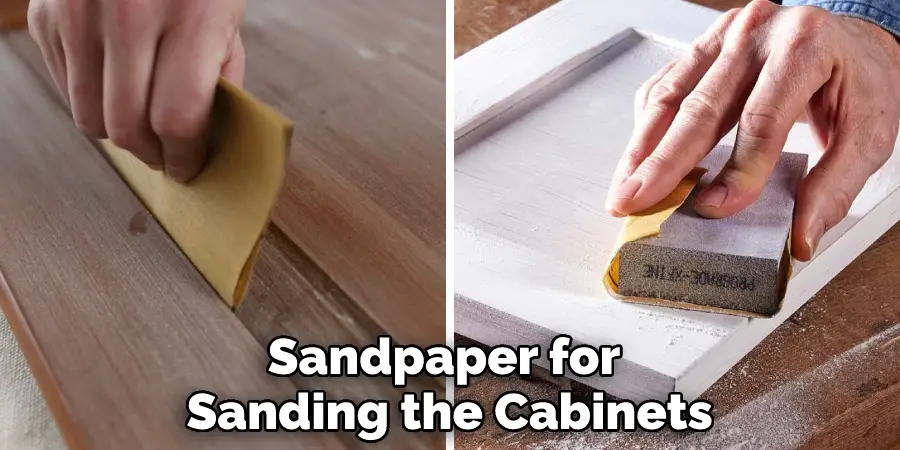
The next step is to sand the cabinets. This will help to create a smooth surface for the paint to adhere to. If you skip this step, the paint will likely not adhere properly and eventually start peeling. Use medium-grit sandpaper for sanding the cabinets. First, sand in the direction of the grain. Then, sand across the grain. Sand until the surface is smooth. Once you’re finished sanding, use a vacuum to remove any dust. Then, use a clean cloth to wipe down the cabinets.

7. Tape Off the Cabinets
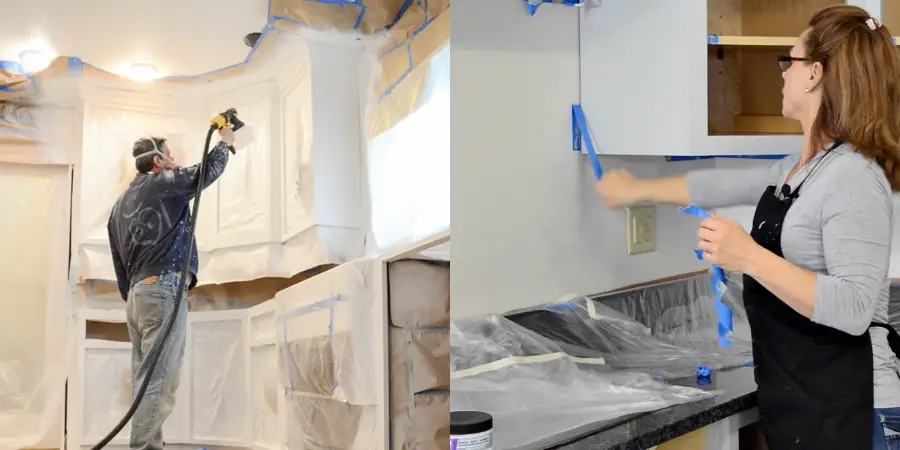
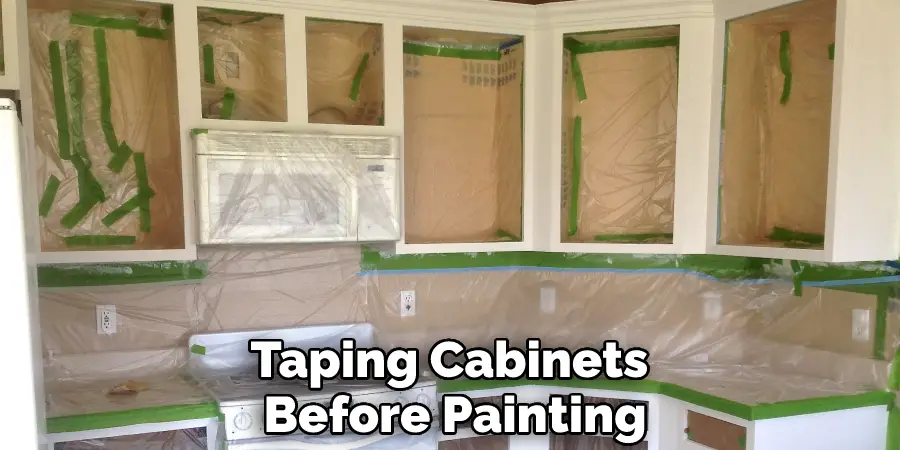
The next step is to tape off the cabinets. You’ll need to use painters’ tape to Protect any areas that you don’t want to paint. This includes the floors, countertops, and backsplash. Cover these areas completely with tape. To do this, press the tape down firmly so that it sticks. Then, use a putty knife to go over the edges of the tape.
This will help to create a seal so that the paint doesn’t bleed through. If you’re painting the cabinets with a brush, you’ll need to tape off any areas the brush can’t reach.
8. Tape Off Inside Surfaces of Cabinets
In addition to taping off the outside surfaces of the cabinets, you’ll also need to tape off the inside surfaces. This includes the shelves and any drawers. Use painter’s tape to cover these areas so you don’t accidentally get paint on them. Apply the tape and then use a putty knife to smooth it down. If you have any gaps, you can use caulk to fill them in.
9. Prime the Cabinets
The next step is to prime the cabinets. This will help to create a smooth surface for the paint to adhere to. It is important to use a good-quality primer that is designed for use on cabinets. Apply the primer with a brush or roller. Simply follow the instructions on the primer can for best results.
10. Paint the Cabinets
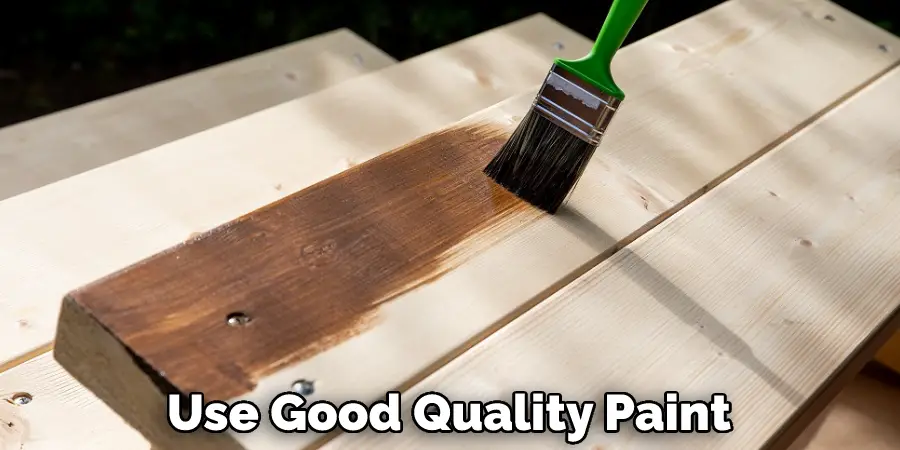
Once the primer is dry, you are ready to paint the cabinets. Again, it is important to use good quality paint that is designed for use on cabinets. Apply the paint with a brush or a roller, using light, even strokes. Start with the doors and then move on to the cabinet frames. Allow the paint to dry completely before moving on to the next step. Paint the cabinets in thin coats, allowing each coat to dry completely before adding another.

11. Remove the Tape
Once the paint is dry, you can remove the tape. Peel it off slowly and carefully. Be careful not to gouge the wood or damage the finish beneath the tape. If you find that the paint has bled under the tape, you can use a razor blade or putty knife to remove the excess paint. Be careful not to damage the newly painted surface.
12. Enjoy Your Newly Painted Cabinets
You’ve now successfully painted your cabinets. Now, it’s time to enjoy your newly painted cabinets. Be sure to wait at least 24 hours before hanging any hardware or putting anything back in the cabinets. This will give the paint time to dry completely. Once the paint is dry, you can reinstall the hardware and put everything back in its place.
What is the Best Masking Tape for Cabinets?
When it comes to painting cabinets, selecting the right masking tape is crucial for achieving a professional and clean finish. The best masking tape for cabinets is one that can adhere to the surface without leaving any residue or damaging the finish upon removal. Many professionals in the industry recommend using blue painter’s tape as it is specifically designed for painting projects.
This type of tape is made of crepe paper with a low-tack adhesive, making it easy to apply and remove without damaging the surface. Another alternative is the delicate surface tape, which is also designed for painted surfaces but has an even lower adhesion level.
This type of tape is ideal for use on delicate surfaces such as cabinets made of softwood or veneer.
Choosing the right tape when painting cabinets is essential to avoid the risk of damage or residue that could affect the final result. While there are many options on the market, blue painter’s tape, and delicate surface tape are the top choices for achieving a professional finish.
What Kind of Tape Won’t Peel Paint?
Painter’s tape, also known as masking tape, is a type of tape that won’t peel paint. Its main purpose is to mask or cover areas on a surface that you don’t want to paint.
Unlike other tapes that may leave a residue behind after removal or peeling off paint, painter’s tape has a gentle adhesive that sticks to surfaces without damaging them. The adhesive can be easily removed without leaving any residue, even if it’s left in place for several days.
This makes painter’s tape the perfect choice for any painting project, helping you achieve sharp and clean lines without damaging the surface underneath. When using painter’s tape, it’s important to apply it properly to ensure it adheres well to the surface without any bubbles or tears. In conclusion, painter’s tape is the way to go if you’re looking for tape that won’t peel paint.
Conclusion
Now that you know how to tape cabinets for painting, it’s time to get started on your project! Follow these simple steps, and you will be well on your way to a fresh new look for your kitchen or bathroom. Remember, if you have any questions along the way, our team is always here to help. Happy taping!

