Have you ever found yourself admiring a piece of furniture and wishing that you had the skills to build something similar at home? Crafting your own bench is more achievable than you might think—and it’s simpler to begin with than you may expect. In this blog post, we’ll take a deep dive into how to make legs for a sturdy wooden bench that can make any room look great!

We’ll cover the best materials to use, how to make bench legs for measuring, cutting, and prepping the wood, plus go over tips and tricks from experienced woodworkers who have gone before. If making independent furniture pieces has been on your mind lately, or if you just need some inspiration for your next creative project, then read on!
Choosing the Best Wood for Bench Legs
When it comes to making furniture pieces, the best wood will always be oak. Oak is a hardwood that not only looks beautiful but can also withstand years of wear and tear, making it ideal when crafting a bench intended to last.
Other types of wood may work as well, so if you want to experiment or take a different approach, feel free to do so. But overall, oak is the most popular and reliable choice for woodworkers who are making bench legs.
Choosing the Best Design for Bench Legs
When it comes to the style of your bench legs, there are several options available. You can choose a classic design with four-turned legs or go modern with sleek straight-line legs. Or you could opt for something more unique, like angular tapered legs or stretchers that span between two posts.
Whatever shape you decide on, use a measuring tape to get an accurate length measurement before you start cutting. This will help ensure that your bench legs are the same size and shape after assembly.
Required Materials
Now that we’ve chosen our material, here is a list of tools and materials you will need to make your bench legs:
- Oak wood boards
- Table saw
- Chisel or pocket knife
- Measuring Tape
- Hammer
- Screwdriver or drill
- Clamps
- Sandpaper
9 Instructions on How to Make Bench Legs
1. Measurement
Start by measuring the desired length of your bench legs. The most common sizes range from 12-15 inches, but you can also tailor it to your own needs. The right measurements are essential for achieving the best results. That’s why it’s important to use a measuring tape when cutting your wood.
2. Cutting
Once you have the measurements, you can begin cutting the oak boards with a table saw. Make sure that all your boards are of equal length and width for even support throughout the bench legs.
3. Drilling Holes
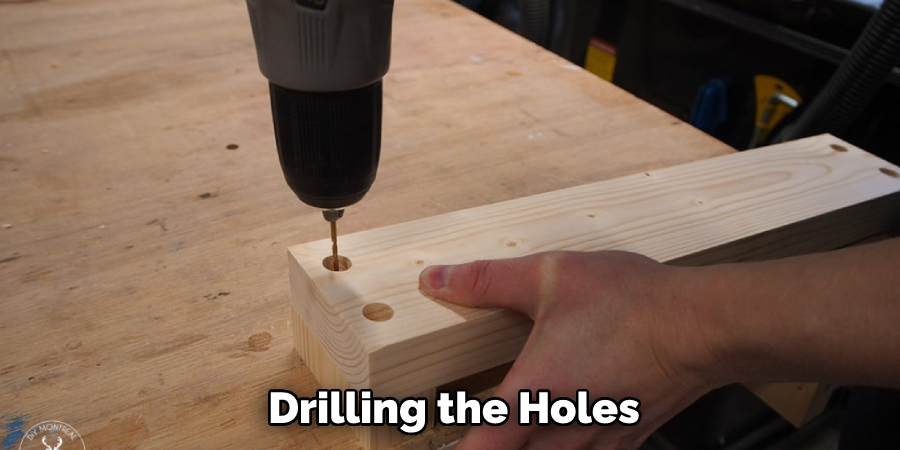
Using a drill or a screwdriver, create holes in the wood for screws. This will make it easier to attach the legs to your bench later on. Drilling the holes into the wood can be a bit tricky, so it’s best to use clamps to hold the boards steady while drilling.

4. Shaping
Using a chisel or pocket knife, start shaping your bench legs. If you’re opting for a traditional look, then you’ll need to create grooves and decorative patterns along each leg.
5. Re-measuring
To make sure your legs are of equal length, measure them one more time before proceeding with assembly. This will help you avoid any costly mistakes later on. When you’re satisfied with the measurements, you can move on to the next step.
6. Sanding
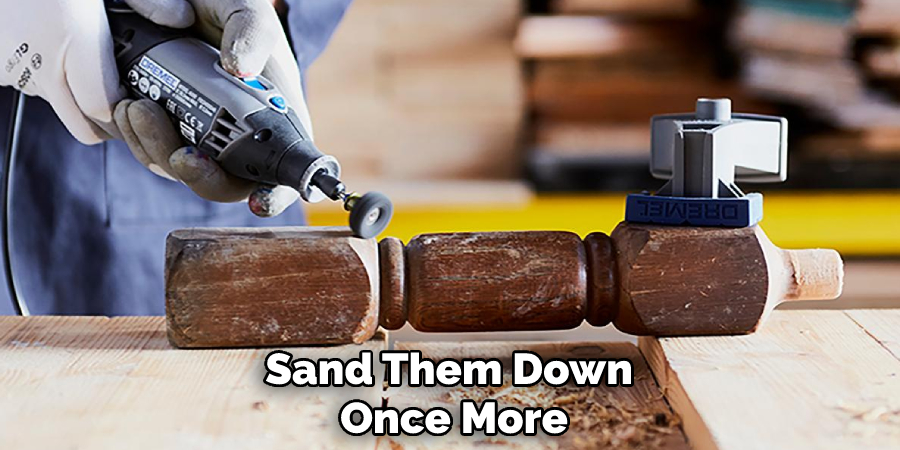
Now that your legs are shaped and measured, it’s time to sand them down for a smooth finish. Use sandpaper with a medium-grit rating and apply it in circular motions to all surfaces of your bench legs. This will help ensure a consistent finish and make them ready for assembly.
7. Preparing the Bench
Attach the legs to your bench frame using screws or nails. This will help secure them in place before any further assembly is done. Make sure all four sides are perfectly aligned to avoid any wobbling during use.
8. Sanding Again
Once the legs are attached to the bench, sand them down once more. This time, you can use fine-grit paper for better results. Make sure to lightly apply pressure while sanding and move in consistent strokes. This will help blend the wood together and give it a uniform look.

9. Finishing Touches
Now that you’re almost done, it’s time to add the finishing touches. Apply a coat of wood stain or varnish to give your bench legs a shiny and long-lasting finish. Make sure to let them dry completely before using them.
Making bench legs is a great way to show off your creative skills and make something unique. With the right materials, tools, and techniques, you can craft sturdy and beautiful furniture pieces that will last you years.
8 Safety Precautions to Follow When Making Bench Legs
When making bench legs, safety should always be the top priority. To ensure you stay safe and accident-free, here are 8 of the most important safety precautions to follow:
1. Wear appropriate clothing. Loose-fitting clothes could get caught in the spinning blade or saw. Make sure to wear protective gear such as safety glasses, earplugs, and a dust mask. The clothing should be comfortable and snug.
2. Clear the work area of any flammable materials, such as solvents or aerosols. Make sure that your workspace is free from distractions and clutter so you can focus on your project. The area should also be well-lit and ventilated.
3. Make sure your power tools are in good condition, and the blades are sharp. Keep the tools clean and lubricated, and always use safety guards on moving parts. The power switch should be in the “off” position when not in use.
4. Double-check your measurements before proceeding with the cutting. Once you start cutting, it can be difficult to change the size of the piece. Double-check your measurements to ensure accuracy.
5. Use clamps and jigs to secure the material you are cutting into place. This will prevent it from shifting while you are working, which could result in an injury or damage to the material.
6. Always keep your hands away from blades and spinning parts when using power tools. Do not wear jewelry or lose clothing, as these can get caught in the tool and cause an accident.
7. Use ear protection when using power tools to prevent hearing loss from loud noise. Loud noise may also distract you, increasing your chances of making mistakes.
8. Regularly check your equipment for any signs of wear and tear, such as fraying cords, damaged blades, or rust on metal parts. Replace any parts that are not functioning correctly or appear to be worn out.
Following these safety precautions will help you create a beautiful bench with legs that are sturdy and safe. Taking the time to make sure your workspace is organized, your measurements are accurate, and your power tools are in good condition will ensure you stay safe while making bench legs!

Frequently Asked Questions
How Long Will It Take to Finish the Project?
The amount of time it takes to complete a project depends on the complexity and design of the bench legs you are making. Generally, for basic designs with straight cuts, it should take a few hours.
If you are cutting intricate angles or using more complex joinery techniques, it may take longer. Additionally, if you plan to finish the wood with a stain or paint, expect the total project time to increase.
How Much Will It Cost?
The cost of the project depends on the materials you use. Basic lumber from your local hardware store will be relatively inexpensive, but specialty hardwoods or pre-cut pieces can be more expensive.
Additionally, if you plan to use any joinery techniques, such as pocket holes, dowels, or mortise and tenon joints, you may need to invest in supplies such as drill bits, jigs, and chisels. If you plan to finish the wood with stain or paint, be sure to factor in the additional cost of these items as well.
How Long Should Bench Legs Be?
The length of the bench legs is highly dependent on the type of bench you are building. If it is a dining-height table, the legs should generally be 28 to 30 inches long. For a coffee table, consider making them 15 to 18 inches tall.
You can also adjust the length for aesthetic reasons or comfort when sitting on the bench. If you are unsure of the length of your bench legs, it is best to measure the height of the seat and add a few inches. This will ensure that your benches are comfortable for sitting.

Conclusion
Making bench legs is a great and easy DIY project that you can do yourself in no time. Whether it’s for an existing bench or to go with the one you just made, all you need is some basic tools and a couple of planks. With just a few simple steps on how to make bench legs, you’ll have sturdy and stylish bench legs in no time! When all is said and done, these legs will look like they were professionally made and provide a long-lasting addition to any living space.
Of course, if the building isn’t your thing, there are plenty of options available at your local hardware store or online, so don’t fret. From ornate designs to functional and modern ones, creating bench legs has never been easier! Don’t be afraid to experiment with different types of wood and stains– the possibilities are endless!

