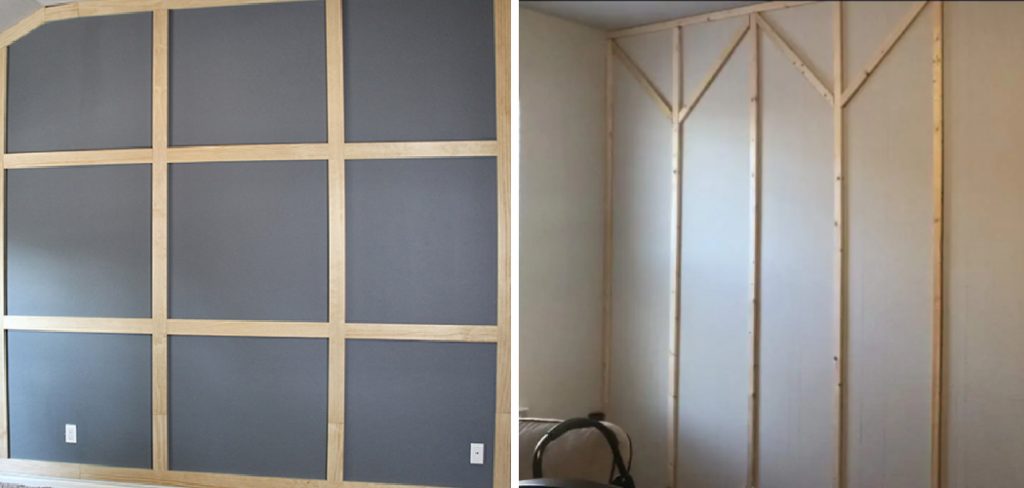
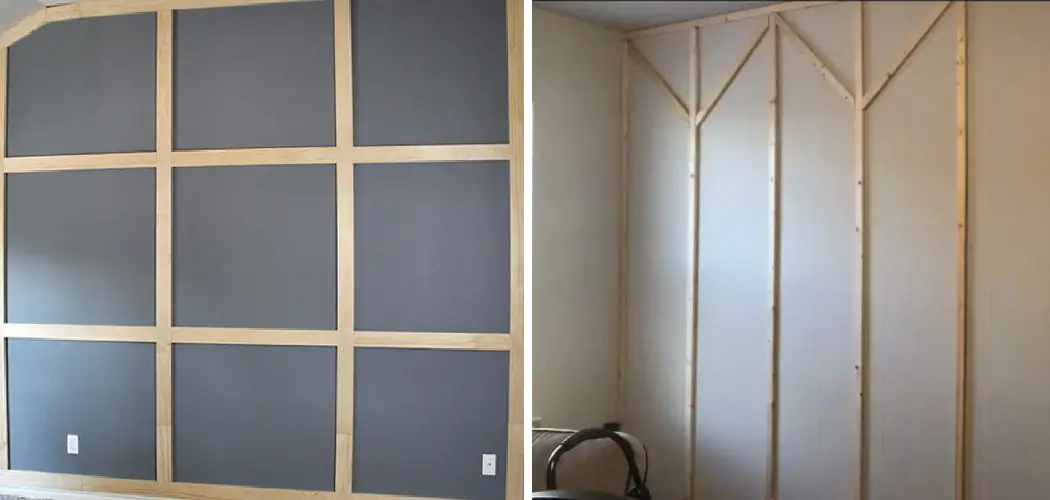
Adding wood trim to an accent wall is a great way to add character and cozy, rustic vibes to any room. With the right materials and some time, you can make yourself a beautiful feature wall that’s sure to be the talk of all your guests.

Not only will adding wood trim give you a natural aesthetic, but it requires relatively few supplies compared with other finish carpentry projects – making it perfect for both newcomers and experienced DIYers alike!
Today we’ll walk through how to make an accent wall with wood trim – from picking out your ideal colors and woods, prepping the space, and understanding tools like miter boxes or jigsaws –to tips on installation and finishing touches. Let’s get started!
What Type of Wood Is Used for Accent Walls?
When choosing wood for an accent wall, you should consider the type of wood that will best complement the style and décor of your space. Popular woods for an accent wall include oak, pine, hickory, cherry, maple, and birch. Each of these woods has its own unique characteristics, which can give your room a distinct look and feel.
Oak is a classic choice that gives off an elegant, timeless appearance. Pine has a more rustic appeal, while cherry is known for its deep, rich color. Hickory is often used to give a room a warm, cozy feel and maple wood offers a modern look with its light hue. Lastly, birch wood can create an accent wall that looks sophisticated and chic.
When selecting wood for your accent wall, you should also consider the finish you would like it to have. You can choose from different types of stains or paints to give the wood an even greater impact in your space. Experimenting with different shades of stain or paint can help bring out the natural beauty of the wood as well as give your room an eye-catching feature.
To make your accent wall really stand out, you can also add wood trim to enhance the design. Wood trim is a great way to frame the area and create an attractive border around the wall. You can select from different types of wood that will match or contrast with your chosen wood for the accent wall. This will create a striking look that can draw the eye into the space.
9 Methods How to Make an Accent Wall with Wood Trim
1. Decide on the Accent Wall.
The first step is to decide which wall will be the accent wall. This is usually the wall that is most visible or the wall where you want to make a statement. If you want to create an accent wall with wood trim, the wall should have a prominent place in your room.
To create a focal point, choose the wall that faces your most used entrance. However, it is best to avoid walls with windows or large furniture. Make sure you measure the wall to determine how much wood trim you will need.

2. Choose the Wood Trim.
Once you have decided on the accent wall, you need to choose the wood trim. There are many different types and styles of wood trim, so take your time to browse through all of the options before making a decision. Consider the type of wood you want to use, as well as it’s color and finish.
If you are looking for a more rustic look, consider using reclaimed wood or a distressed finish. If you are looking for something more modern and contemporary, consider using painted trim or a smooth finish. Though it may be tempting to try and match the existing trim in the room, keep in mind that the accent wall should stand out, so opt for something different.
3. Measure the Wall.
Before you can start installing the wood trim, you need to measure the wall. This will ensure that you have enough trim to cover the entire wall. To do this, use a measuring tape and mark the wall in pencil at different points to indicate where each piece of trim should go.
This will also help you to ensure that the trim is installed in straight lines. Once you have marked the wall, it’s time to start installing the wood trim. Although it might look complicated, this process is actually quite simple.
4. Cut the Wood Trim to Size.
Once you have measured the wall, you will need to cut the wood trim to size. You can do this with a saw or by using a power drill with a saw attachment. Make sure that the cuts are precise to ensure a neat finish.

While the wood can be cut by hand, it will take longer and may not create a smooth finish. To ensure the accuracy of your cuts, use a measuring tape and mark the lines before cutting. Try to avoid splintering the wood and use a saw blade with more teeth for a cleaner cut.
5. Attach the Wood Trim to the Wall.
Now it’s time to attach the wood trim to the accent wall. You can do this by using nails, screws, or adhesive strips. Be sure to use nails or screws that are long enough to go through both the trim and into the studs behind the drywall. If you opt for adhesive strips, make sure that the instructions on the packaging are followed correctly.
Once the trim is securely affixed to the wall, you can move on to the next step. However, if you are having trouble getting the trim to stay in place, you may need to use additional nails or screws. Try to space them out evenly and make sure that the nails or screws are going into a stud.
6. Add Finishing Touches.
Once all of the wood trim is attached to the accent wall, you can add finishing touches such as paint or stain. If you are using paint, be sure to use a primer first so that the paint will adhere properly to the wood surface.
Choose a color that compliments the other walls in the room, or pick something bold and daring to really make your accent wall stand out. If you want a more rustic look, stain your wood trim with a darker color.

You can also choose to add some decorative elements, such as moldings, or create a pattern with the wood trim to make it even more unique. If you’re feeling adventurous, why not try out some DIY artwork and hang it on the wall? No matter what you choose, your accent wall will be sure to make a statement.
7. Enjoy Your New Accent Wall!
That’s it! Once you’ve completed all of these steps, you’ll have a beautiful new accent wall that will add character and style to your home. You can feel proud of the hard work you put in and enjoy your new space.
Don’t forget to take pictures before and after so you can show off your hard work to family and friends. And if you want to make any more changes, now you have a better idea of how to go about it. Have fun with your accent wall!
8. Clean Up.
Once you’re finished, make sure to clean up your work area and dispose of any excess materials that you might have used. This will help you keep your project looking neat and reduce clutter in the future. Also, make sure to follow any safety precautions that are required when working with wood trim and other materials.
Finally, enjoy your new accent wall! It’s a great way to transform a space and add some character to your home. With these tips, you’re now ready to create an accent wall with wood trim. However, remember that this is a fairly involved process and it’s best to be prepared before you start. Be sure to gather the appropriate materials, plan out your design, and take necessary safety precautions.
9. Maintenance.
To ensure that your accent wall looks its best, you should occasionally clean it with a soft cloth and wood cleaner. This will help to remove any build-up of dirt and grime that may accumulate over time. You can also apply a wood sealer or varnish every few years to protect the trim from moisture, fading, and wear.
Finally, if you find that there are gaps between the pieces of trim, you can use caulk or spackle to fill them in. This will help to keep the wall looking neat and professional. With proper care, your accent wall with wood trim should last for many years to come.

Conclusion
In conclusion, creating a wood-trim accent wall can be a great way to transform any room in your home. The materials are relatively inexpensive and easy to source, and the installation can be manageable with the right approach. Start by deciding on a design, layout, and style that you like. Prepare all of the items necessary for the project and get creative with it!
You may even be able to recycle or repurpose furniture or other items for an extra unique look. Thanks for reading, and we hope this has given you some inspiration on how to make an accent wall with wood trim!

