Are you looking for a cost-effective and straightforward way to add privacy and security to your home? Building a deck gate is one of the most practical solutions that don’t require costly materials or intricate carpentry skills. It’s an ideal project for DIYers that want to spruce up their outdoor space with a stylish and secure decorative feature! Not only will this ramped-up safety measure protect children from accessing potential danger areas, but it can also provide homeowners with peace of mind when entertaining guests outdoors.

In this blog post, we’ll show you how to build deck gate step by step, regardless of your budget. By following our expert tips, you’ll have the perfect blend of style and security in no time!
What Are the Benefits of Installing a Deck Gate?
Installing a deck gate has many benefits, from providing security and privacy to adding extra value to your home. It makes it easier for you and your family to access the deck without having to go around the house or through other doors, and it also creates an extra layer of safety for small children or pets. A sturdy, good-looking gate can also be a great design feature – making your outdoor space look even more inviting. Plus, if you ever decide to sell your home, potential buyers will appreciate the added security that a quality deck gate provides!
Overall, a deck gate is an affordable and easy-to-install project that can greatly improve the function and appearance of your outdoor area.
What Will You Need?
Before you get started, you’ll need to gather the following tools and materials:
- Wood planks or metal bars
- Screws and screws drivers
- Drill
- Carpenter’s square
- Measuring tape
- Hinges
- Latches
- Paint/stain
- Sandpaper
- Wood glue (optional)
Once you’ve gathered the necessary tools and materials, you can begin constructing your deck gate.
10 Easy Steps on How to Build Deck Gate
Step 1: Measure Your Area
The first step in how to build a deck gate is to measure the area where you plan to install it. This will help determine how large of a gate you’ll need and how many planks/bars you’ll need to buy. If your gate spans a wide area, you may want to consider investing in additional planks or bars, as they will provide extra stability.
Step 2: Cut the Planks and Bars

Cut the planks/bars to the desired size using a saw or an electric jigsaw. If you use metal bars, you may want to use a hacksaw or a reciprocating saw. Be sure to measure twice and cut once!
Step 3: Attach the Planks/Bars
Using screws and a drill, attach the planks/bars together using either wood glue (optional) or fasteners like nuts and bolts. If you are building a gate with multiple sections, be sure to secure them at each joint. Don’t forget to use the carpenter’s square for accurate measurements.
Step 4: Sand Down and Paint/Stain
Once you’ve attached all the planks/bars together, it’s time to sand them down and paint or stain the finished product. This will help protect the wood from the elements and make your gate look great! You can use a sander or sandpaper for this step.
Step 5: Attach the Hinges
Now it’s time to attach the hinges. This will allow the gate to open and close with ease. Start by drilling pilot holes for each hinge, then attach them using screws or bolts. Make sure to follow the manufacturer’s instructions for proper installation.
Step 6: Attach Latches & Handles
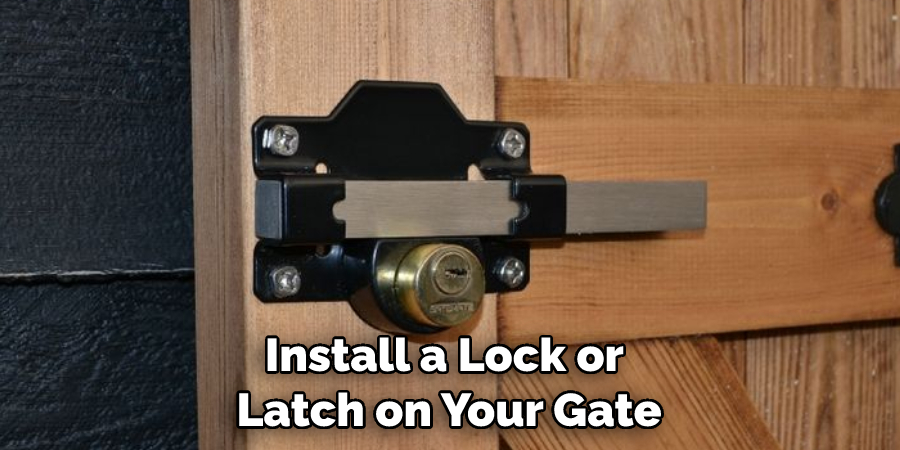
Next, you’ll need to install the latches and handles that will secure the gate when it is closed. Be sure to use weather-resistant materials if your gate will be exposed to rain or snow. If you plan to use a lock, ensure it is keyed to match the other locks on your property.
Step 7: Install Gate Posts
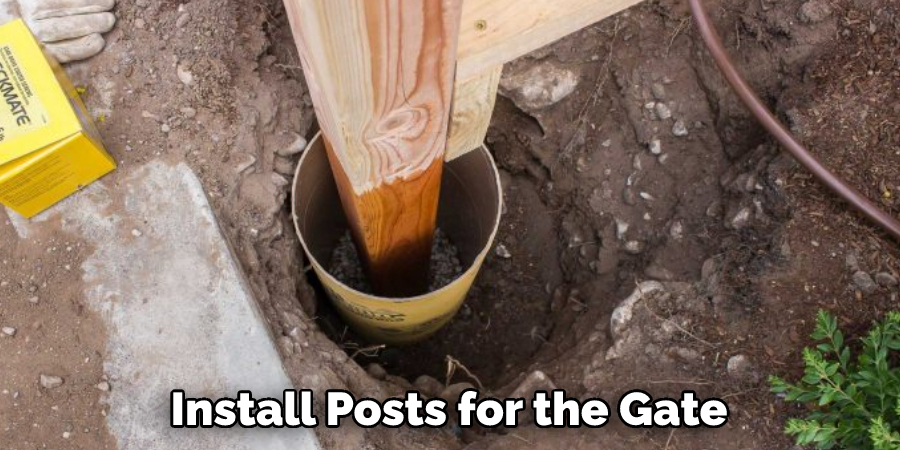
Now you’ll need to install posts for the gate to attach to. Depending on your gate’s width or height, you may want to use either 4×4 or 6×6 posts. Use concrete and screws/bolts to secure them into the ground. There are also pre-made posts available at most home improvement stores.

Step 8. Attach the Gate
Now you’ll need to attach the gate to the posts. Make sure to line up the hinges with the posts and use screws/bolts to secure them into place. If you have a double-swing gate, make sure to check how much clearance is needed between both sides when it swings open before attaching it.
Step 9: Test It Out
Before you call it a day, test out your new gate by opening and closing it several times. Check for any loose parts or wobbling that might need adjusting. You can also add an extra layer of security by installing a lock or latch at this point if desired.
Step 10: Enjoy Your New Deck Gate!
You’ve done it! You know how a secure and beautiful deck gate will keep your family safe and add to the overall look of your home. Congrats on a job well done!
Now sit back, relax and enjoy the view from your newly completed deck gate!
Congratulations—you have just built yourself a stylish and secure deck gate in no time! With these ten easy steps, you can create a beautiful addition to your backyard while providing extra security for your family. So grab your tools and materials today, and start building!
5 Additional Tips and Tricks
- Add planks or bars to the gate frame for extra stability.
- To make your gate look more polished, be sure to sand down and paint/stain the wood/metal before installing it.
- Use weather-resistant materials when installing hinges, latches, and handles if your gate is exposed to rain or snow.
- To ensure accurate measurements, always use a carpenter’s square when attaching the planks/bars together.
- For extra security, install a lock or latch on your gate that is keyed to match the other locks on your property.

These helpful tips and tricks will ensure that you have a stylish and secure deck gate for years to come.
5 Things You Should Avoid
- Using treated wood that has not been pressure-treated. This can cause rot and decay in the wood over time.
- Not paying attention to how heavy your gate will be once it is complete. Too much weight could cause the gate to sag or even collapse over time.
- Use nails instead of screws for attaching hardware such as hinges, locks, and latches, as these may work loose over time due to vibration from wind and other elements causing gate failure.
- Not making sure your posts are plumb (straight vertical) before you build your deck gate around them – crooked posts can result in a lopsided gate!
- Not considering the width of your gate when determining how many pickets or balusters you will need – too few can make the gate look incomplete and flimsy, while too many will cause it to be difficult to open!
With a little know how and the right tools, you can easily build a sturdy and attractive deck gate that will keep your family safe while providing an access point to your deck. Good luck!
What Kind of Wood Should I Use for an Outside Gate?
When selecting the right kind of wood for an outside gate, you should consider how exposed it will be to weather conditions. If your gate experiences severe weather, such as rain, snow, or intense sunlight, then you should choose durable and rot-resistant species such as cedar, redwood, or pressure-treated pine.
These woods are also ideal for staining or painting the gate. For areas that experience less extreme temperatures and minimal moisture and sunlight exposure, other softwoods like spruce, fir, or pine can be used instead.
The important thing is to make sure whatever wood you use is treated with a stain or paint finish that provides protection from the elements to keep your deck gate looking its best!

What Are Some Common Deck Gate Designs?
Many different deck gate designs are available, from simple picket styles to lattice-top or framed arched gates.
Depending on how much security and privacy you want, how often the gate will be used, and what type of aesthetic you’re going for, there is a design that will suit your needs perfectly.
A few popular options include the classic “X” style with alternating vertical and horizontal boards; a full lattice-top gate for added security and privacy; an arched frame that adds a touch of elegance; or an open panel picket design for a traditional look.
With so many possibilities, creating the perfect deck gate for your home is easy!
Conclusion
Building a deck gate doesn’t have to be complicated or overwhelming. With the right tools and supplies, you can create a beautiful and relatively straightforward design in no time. Have patience and take your time when working on the project; you’ll find it’s well worth the effort. Be sure also to factor in a few extra days for drying time, so your gate is ready to open as soon as possible.
Deck gates are an excellent addition to any outdoor space, giving homeowners added peace of mind while also creating a beautiful focal point of their home. With the right advice, resources, and materials, anyone can build their own unique deck gate design that suits their personal style.
Hopefully, the article on how to build deck gate has provided you with the insight and information necessary to start your project. Good luck!
You Can Check It Out to Install Wood Slab Countertop

