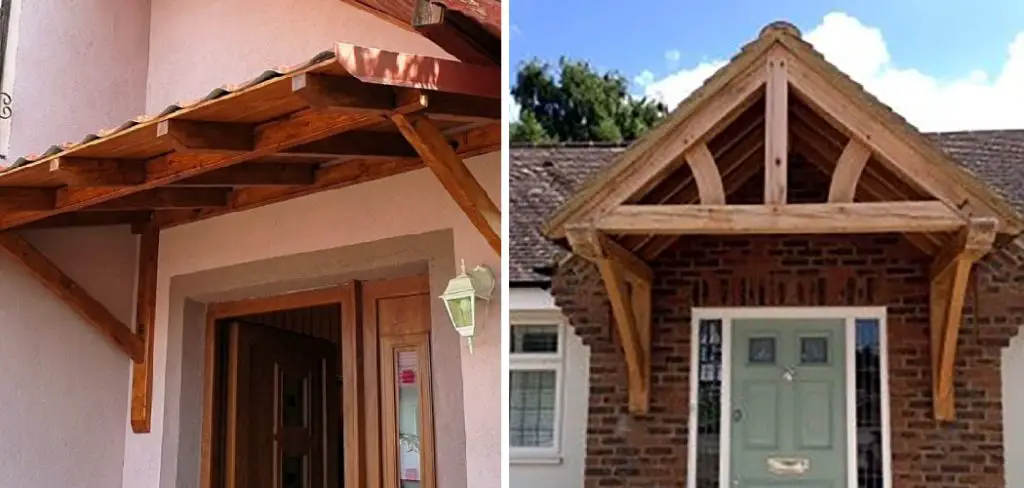
Adding a door canopy to your home not only provides practical benefits but also adds a touch of elegance to your entrance. A door canopy serves as a protective shelter, shielding your doorway from the elements and offering shade and shelter to visitors.

Building a door canopy yourself allows you to customize the design, size, and materials to match your home’s architectural style and personal preferences. In this article, we will guide you through the process of how to build a door canopy yourself step by step, providing you with the necessary information and tips to successfully complete the project.
Whether you are a seasoned DIY enthusiast or a beginner, this guide will help you create a functional and attractive door canopy that enhances your home’s aesthetics while offering protection and comfort.
Is a Door Canopy a Good Idea?
When it comes to improving the look of your home, building a door canopy is an excellent option. Door canopies provide a sheltered entryway for visitors as well as valuable protection from the elements, such as rain and snow. They also add an attractive architectural feature that enhances the overall aesthetic of your home’s exterior.
However, before you decide to build a door canopy yourself there are some things you should consider. It’s important to choose materials that will stand up to weather conditions in your area and be sure that they are suitable for outdoor use. You’ll also need to ensure that you have the necessary tools and skills required to build the canopy safely and securely.

In addition, there are certain safety regulations concerning the installation of door canopies that must be followed. Therefore, it’s always a good idea to consult with your local building authority before taking on such a project to ensure that you are legally compliant.
Overall, building a door canopy yourself can be an excellent way to enhance the look of your home and provide protection from the elements. However, it’s important to do your research and make sure that you follow all safety regulations in order to build a secure and attractive structure.
The information provided here is for general educational purposes only; please refer to local authorities for specific details regarding permits and regulations. Taking on any DIY projects should only be done after careful consideration of safety measures first and foremost.
What Is a Door Roof Called?
A door roof, or door canopy, is a type of overhang that attaches to the top of an exterior doorway. It provides shelter from rain and other natural elements, as well as creates a welcoming entrance for your home’s visitors. Door canopies are often made from materials such as wood, aluminum, PVC, or even glass.
When building your own door canopy, you’ll want to make sure it is large enough to provide adequate coverage and protection while still blending in with the overall style of your home. You’ll also need to choose the right materials for your project depending on the climate and the condition of your existing roofing material. Try to match the color of your door canopy to the existing roofing materials, too.
When installing your door canopy, make sure you use appropriate screws and bolts that are suitable for outdoor use and can withstand heavy loads. Be sure to secure the frame with wall anchors so it won’t blow away in strong winds. If you’re using a material such as glass or PVC, it’s important to seal any joints carefully to prevent water from getting inside your home.

Finally, depending on where you live, it is possible that building permits may be required for this kind of project – check with your local regulations before beginning construction. With careful planning and some hard work, you’ll have a beautiful new door roof in no time!
9 Methods How to Build a Door Canopy Yourself
1. Gather Your Supplies
The first step in building a door canopy is to gather all of the necessary supplies. You will need a piece of lumber that is long enough and wide enough to span the width of the door, two support beams, four L-brackets, screws, nails, and a hammer.
You will also need a saw to cut the lumber to size. Additionally, you may want to purchase a weatherproof sealant for the wood. To finish off the canopy, buy paint or stain in a color that matches your house. Although this is optional, it will give the canopy a more finished look.
2. Cut the Lumber to Size
Once you have gathered all of your supplies, the next step is to cut the lumber to size. The piece of lumber you will use for the canopy should be long enough to span the width of the door and extend at least six inches on either side. Use a saw to cut the lumber to size.
You will also need to cut two pieces of lumber for the sides. Measure how long you want the canopy to be and mark the length on the sides of the lumber. Make sure to cut the pieces at a right angle so that they fit flush against the top piece. Use a saw to make the cuts and sand down any rough edges.

3. Attach the Support Beams
Next, you will need to attach the support beams to the piece of lumber. Place the support beams on either side of the lumber, flush with the edges. Use screws or nails to secure the beams in place. Make sure they are securely fastened.
Once the support beams have been attached, you can begin constructing the frame of the door canopy. Place four pieces of lumber in a rectangular shape, with the support beams at each corner. Secure them with screws or nails. Make sure that the frame is square and even.
4. Attach the L-Brackets
Once the support beams are in place, you will need to attach four L-brackets to each beam. The brackets should be placed so that they are evenly spaced and aligned with the corners of the door opening. Use screws or nails to secure the brackets in place.
If you are using a drill to screw in the screws, make sure to use appropriate drill bits so that you do not damage the brackets. Though it is more time-consuming, you may choose to use a screwdriver instead. Try tooo use screws and nails of the same size to ensure uniformity.
5. Hang the Canopy
Once all of the brackets are in place, you can hang the canopy over the door opening. Center the canopy over the door opening and use screws or nails to secure it in place. Make sure that all of the screws or nails are driven into solid wood so that they will not come loose over time.
6. Add Trim (Optional)
If desired, you can add trim around the edges of your door canopy for a more finished look. Cut pieces of trim to size and use screws or nails to attach them in place around the perimeter of your canopy. Depending on the type of trim you choose, you may need to use a drill or a saw to make sure your pieces fit properly. Once all trim pieces are attached, you can use caulk or wood filler to cover any gaps.

7. Enjoy Your New Canopy
Once all of the pieces are in place and securely fastened, you can now enjoy your new door canopy. The added protection from the elements will be a welcome addition to your home! You can also add a personal touch to your canopy by painting it or adding decorative trim.
If you have some spare time and minimal carpentry skills, you can build your own door canopy and add a stylish feature to your home. With just a few basic tools, some materials, and a bit of patience, you can transform your entrance into a beautiful and inviting space.
8. Clean & Maintain
To keep your door canopy looking its best, it is important to regularly clean and maintain the area. You can use a soft brush and mild detergent to clean off any dirt or debris that accumulates on the structure, as well as on the canopy material.
Make sure to rinse off any cleaner with clean water and allow the area to dry before reattaching or replacing the canopy material. Additionally, it is important to check the structure periodically and tighten any loose screws or bolts as needed.
9. Inspect
It is also important to regularly inspect the canopy for any signs of wear or damage. Make sure all screws, nails, and bolts are secure and that all joints are sealed tightly against water intrusion. If you notice any signs of damage, take action immediately to repair it before it becomes a bigger problem.
Conclusion
To recap, building a door canopy can be done as a DIY project with the right materials and tools. You’ll need to measure for the correct dimensions of your door, cut wood planks for the beams, fit the frame around your doorway, construct side frames to support the main frame and connect them together, add an awning to give it that classic look and secure everything with finishing nails.
The great thing is you already have all you need, so no expensive trips to home improvement stores are needed. Now that you have the summary of how to build a canopy over your door step by step, it’s time to get started! Thanks for reading, and we hope this has given you some inspiration on how to build a door canopy yourself!

