

Few home projects deliver the same sense of pride as building your own billiard table. Every time friends gather for a game, you get to say those four magic words: “I built that.” A billiard table is more than furniture. It’s a centerpiece, a conversation starter, and a lifelong source of fun.
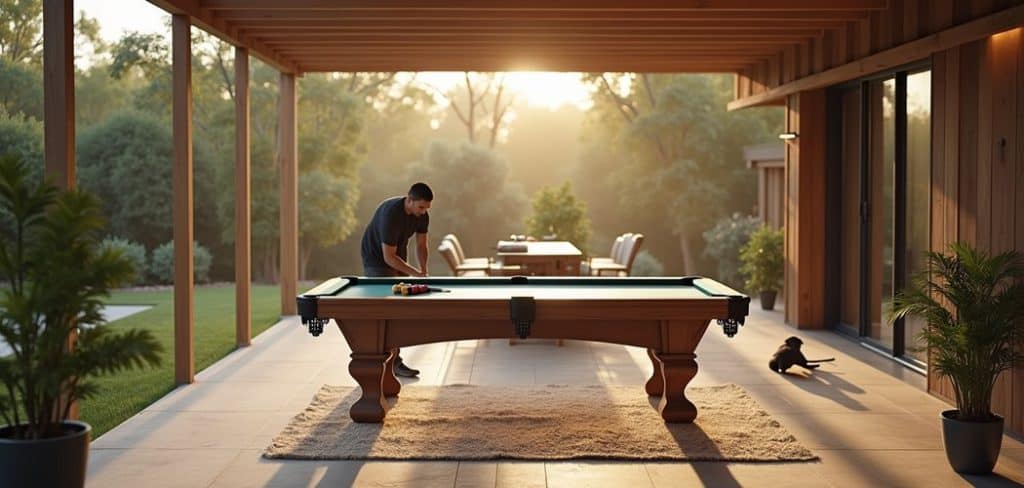
Sure, buying a table from a store is easier. But building one yourself gives you total control over size, style, and quality. You choose the wood, the felt color, and the finish. You learn skills along the way. And you often save money compared to buying a premium table.
This guide on how to build billiard table walks you through the entire process, from gathering materials to laying the final coat of finish. Whether you’re a weekend woodworker or a seasoned DIY pro, you’ll find clear steps and helpful tips here. Let’s turn your garage or workshop into the birthplace of your dream table.
What are the Benefits?
Building your own billiard table comes with plenty of rewards. Here are the biggest reasons why the effort pays off.

- Cost savings. Quality billiard tables can cost thousands of dollars. When you build your own, you pay mostly for materials. Even with good slate and premium felt, you’ll likely spend far less than the retail price of a comparable table.
- Full customization. You decide everything. Want a walnut frame with green felt? Done. Prefer a modern black finish with blue cloth? Easy. You can match the table to your room, your taste, and your budget.
- Perfect fit for your space. Store-bought tables come in standard sizes. When you build your own, you can tailor the dimensions to fit your room. This matters a lot in tight spaces where cue clearance is limited.
- A rewarding challenge. There’s real satisfaction in creating something with your hands. You’ll sharpen your woodworking skills, learn about leveling and precision, and gain confidence for future projects.
- A lasting family heirloom. A well-built table can last for decades. Yours might become the table your kids and grandkids play on. That kind of legacy is hard to buy.
- Better understanding of maintenance. Once you’ve built it, you know every part of the table. Fixing a loose rail or replacing felt becomes simple because you understand how it all fits together.
What Will You Need?
Before you start, gather everything you need. Having the right materials and tools on hand keeps the project smooth and stress-free.
Materials:
Tools:
Optional but Helpful:
Take your time sourcing quality materials. The slate and cloth make the biggest difference in how the table plays, so don’t cut corners there.
- Slate bed (three pieces, typically 1-inch thick) or a high-grade MDF alternative
- Hardwood or plywood for the frame and legs (oak, maple, or birch work well)
- Billiard cloth (wool or wool-nylon blend felt)
- Rubber cushions (K-66 profile rails are standard)
- Wood for the rails
- Six pocket sets (leather or plastic)
- Wood glue and construction adhesive
- Screws, bolts, and washers
- Beeswax or specialized slate filler
- Wood stain and finish (polyurethane or lacquer)
- Sandpaper (various grits)
- Staples for attaching cloth
- Circular saw or table saw
- Drill and driver bits
- Router
- Level (a long carpenter’s level and a machinist’s level)
- Measuring tape and framing square
- Clamps
- Staple gun
- Screwdrivers
- Chisels
- Rubber mallet
- Safety glasses and gloves
- Pocket hole jig
- Sander (orbital or belt)
- Shims for leveling
10 Easy Steps on How to Build Billiard Table
Step 1: Plan and Measure Your Table
Start with a solid plan. Decide on the table size you want. Standard sizes include 7-foot, 8-foot, and 9-foot tables. The playing surface should follow a 2:1 ratio, meaning the length is twice the width. For example, an 8-foot table has a playing area of about 88 inches by 44 inches.
Sketch your design and note every measurement. Include the frame, legs, rails, and cabinet. A detailed plan prevents costly mistakes later. Measure your room too, and leave at least five feet of clearance on all sides so players can use their cues comfortably. Write everything down before you cut a single board.
Step 2: Build the Frame
The frame is the backbone of your table. It must be strong enough to support heavy slate without sagging. Cut your hardwood or plywood to size based on your plan. Assemble the outer frame first, joining the corners with wood glue and screws for maximum strength.
Add cross supports inside the frame. These beams carry the weight of the slate and keep it from bowing. Space them evenly, usually every 12 to 16 inches. Use a framing square to confirm every corner sits at a perfect 90 degrees. A crooked frame will haunt you through every later step, so double-check your angles now.
Step 3: Attach the Legs
Strong legs keep your table stable and level. Build or buy legs made from solid hardwood. Each leg should be thick and sturdy, since the finished table can weigh several hundred pounds with the slate installed.
Attach the legs to the frame using heavy bolts and brackets rather than just screws. Bolts give you the holding power needed for such a heavy load. Position the legs at the corners and, for longer tables, add a center support pair. Stand the frame upright and check that it doesn’t wobble. Adjust as needed before moving on.

Step 4: Install the Slate Bed
The slate is what gives a billiard table its flawless roll. Lay the three slate pieces on top of the frame, fitting them tightly together. Slate is heavy and fragile, so get help lifting it and move slowly.
Screw the slate down through pre-drilled holes into the frame. Then fill the seams between the slate pieces with beeswax or a slate filler. Melt the wax slightly and press it into the gaps, then scrape it smooth once it cools. A seamless surface ensures balls roll without bumps. This step demands patience, but it’s the heart of a great playing surface.
Step 5: Level the Slate
Leveling is the most important step for playability. Even a tiny slope will make balls drift. Set a machinist’s level on the slate and check it in every direction, including corner to corner.
Use thin shims under the legs or slate to correct any dips or high spots. Adjust one small area at a time and re-check constantly. This process can take a while, so don’t rush. Keep working until the level reads perfectly flat everywhere on the surface. A truly level slate is the difference between a toy and a real billiard table.
Step 6: Attach the Billiard Cloth
Now the table starts to look like the real thing. Roll your billiard cloth over the slate, leaving extra material on all edges. Smooth it out from the center toward the corners to remove wrinkles.
Stretch the cloth tight and staple it to the underside of the slate frame or the wooden backing. Keep tension even as you work, or you’ll create ripples that affect play. Trim the excess cloth once it’s secured. Take your time here, because a smooth, tight surface makes every shot feel professional.
Step 7: Build and Cover the Rails
The rails hold the cushions that give balls their bounce. Cut your rail wood to length and attach the rubber cushions to the inner edge using contact adhesive. The standard K-66 cushion profile delivers reliable rebound.
Cover each rail with billiard cloth, wrapping it tightly and stapling underneath just as you did with the bed. Make sure the cloth over the cushions is smooth and firm. Well-covered rails give consistent, lively bounces. Set the finished rails aside until you’re ready to mount them.

Step 8: Install the Rails and Pockets
Position the covered rails around the edge of the table. Align them carefully so the cushion height sits correctly against the ball. The right height keeps balls on the table instead of hopping over the edge.
Bolt the rails securely to the slate and frame. Then install the pockets at each corner and on the long sides. Leather pockets add a classic touch, while plastic pockets offer durability. Check that each pocket opening is even and that balls drop cleanly. Tighten every bolt firmly.
Step 9: Add Finishing Touches
With the main structure complete, focus on appearance. Sand any exposed wood until smooth. Apply your chosen stain to bring out the grain, then seal it with polyurethane or lacquer for protection and shine.
Attach decorative trim, corner caps, or a nameplate if you like. These small details give your table a custom, professional feel. Let all finishes dry fully before use. This is where your table transforms from a workshop project into a stunning piece of furniture.
Step 10: Test and Enjoy
Before the first real game, test everything. Roll a ball slowly across the table in different directions to confirm it stays true. Bounce balls off each rail to check the rebound. Drop balls into every pocket to make sure they fall properly.
Fix any issues you spot, whether it’s a slight tilt or a loose rail. Once everything checks out, grab your cues, rack the balls, and break. You built this table with your own hands, so take a moment to enjoy the accomplishment before the games begin.
5 Things You Should Avoid
1. Skipping the leveling step. A rushed leveling job ruins play. Never assume the slate is flat. Always test with a proper level and adjust until it’s perfect.
2. Using cheap materials. Thin frames sag, and low-grade cloth wears out fast. Invest in quality slate, sturdy wood, and good felt. Your table will play better and last longer.
3. Stretching the cloth unevenly. Uneven tension creates wrinkles and dead spots. Take your time smoothing and stapling the cloth so the surface stays flat and firm.
4. Ignoring room clearance. Building a table that’s too big for your space makes play frustrating. Measure the room first and leave room for full cue swings on all sides.
5. Weak joints and fasteners. A heavy table needs strong connections. Don’t rely on glue or small screws alone. Use bolts and brackets where the load is greatest.

Frequently Asked Questions
How long does it take to build a billiard table?The timeline depends on your skill level and available time. Most DIY builders finish in one to three weeks of part-time work. Rushing leads to mistakes, especially during leveling and cloth installation. Set aside plenty of time for those steps. If you work full days, you might complete it in a single weekend or two.
Is slate necessary, or can I use MDF instead?Slate gives the smoothest, most professional roll and is the top choice for serious players. High-grade MDF is a cheaper, lighter alternative that works for casual play. However, MDF can warp over time, especially in humid conditions. If your budget allows, slate is well worth the investment for durability and performance.
How much does it cost to build a billiard table?Costs vary based on materials and size. A basic build with MDF might cost a few hundred dollars. A premium table with slate, hardwood, and quality cloth can run over a thousand. Even so, building your own usually costs far less than buying a comparable table. Shop around for the best deals on slate and felt.
Conclusion
How to build billiard table is a big project, but the payoff is huge. You’ll end up with a custom table built to your exact taste, sized perfectly for your space, and made to last for years. Along the way, you’ll pick up valuable skills and the deep satisfaction that only comes from making something yourself.
Take your time, follow each step carefully, and never skip the details that matter most, like leveling and cloth tension. Quality materials and patience will reward you with a table that plays like a pro model.
So gather your tools, roll up your sleeves, and start building. Your dream table, and countless great games, are waiting for you.
