

There’s something deeply satisfying about sitting down to work at a desk you built with your own two hands. A wooden desk with cubbies takes that satisfaction one step further. Not only do you get a sturdy, handsome workspace, but you also gain built-in storage that keeps your papers, gadgets, and daily essentials neatly tucked away. No more clutter spilling across your surface or hunting for that one pen you swear you left right there.

Building your own desk might sound like a job reserved for seasoned woodworkers, but it’s more approachable than you think. With basic tools, a solid plan, and a bit of patience, you can create a piece of furniture that fits your space perfectly and reflects your personal style.
In this guide on how to build a wooden desk with cubbies, we’ll walk you through everything from the benefits and materials to a clear ten-step build process. Grab your safety glasses and let’s get started.
What Are the Benefits?
Before you pick up a saw, it helps to understand why a wooden desk with cubbies is worth the effort. Here are the key advantages that make this project a smart choice.

- Custom fit for your space. When you build your own desk, you decide the dimensions. Whether you have a tight corner in a small apartment or a wide wall in a home office, you can tailor the size, height, and depth exactly to your needs. Store-bought desks rarely fit as well.
- Smart, built-in storage. Cubbies give you organized compartments right where you need them. You can slot in notebooks, chargers, mail, or craft supplies without adding bulky drawers or extra furniture. This keeps your workspace tidy and your focus sharp.
- Durability that lasts. Solid wood stands up to years of daily use. Unlike cheap particleboard desks that sag or chip, a well-built wooden desk can become a lasting fixture in your home and even a family heirloom.
- Cost savings. Quality wooden desks can be pricey in stores. Building your own often costs a fraction of that, especially if you use reclaimed or affordable lumber. You pay for materials, not the brand markup.
- A rewarding creative outlet. There’s real pride in making something functional and beautiful. This project sharpens your woodworking skills and gives you a hands-on break from screens and daily routines.
- Personal style. You choose the wood, the finish, the number of cubbies, and the overall look. The result is a desk that feels uniquely yours — not something pulled off a showroom floor.
What Will You Need?
Getting your materials and tools ready before you start saves time and prevents frustrating mid-project trips to the hardware store. Here’s what you’ll need to build a solid wooden desk with cubbies.
Materials:
Tools:
Having everything on hand before you begin makes the process smooth, safe, and enjoyable. Always wear your protective gear when cutting or sanding wood.
- Plywood sheets (3/4-inch thickness recommended) or solid lumber boards
- Wood screws (1-1/4 inch and 2-inch sizes)
- Wood glue
- Sandpaper (80, 120, and 220 grit)
- Wood filler or putty
- Wood stain or paint of your choice
- Polyurethane finish or varnish
- Corner brackets and L-brackets for reinforcement
- Pocket hole screws (if using a pocket hole jig)
- Circular saw or table saw
- Drill and drill bits
- Pocket hole jig (optional but helpful)
- Tape measure and pencil
- Carpenter’s square
- Clamps
- Level
- Sander or sanding block
- Safety glasses and work gloves
- Paintbrush or foam roller for finishing
10 Easy Steps on How to Build a Wooden Desk With Cubbies
Now that you have your materials and tools ready, it’s time to get building. Follow these ten steps carefully and you’ll have a beautiful, functional desk with cubbies ready to use.
Step 1: Plan Your Design and Measurements
Before cutting a single piece of wood, spend time sketching your desk design on paper or using a free online planning tool. Decide on the total width, height, and depth of your desk. A standard desk stands about 29 to 30 inches tall, but adjust based on your comfort. Map out how many cubbies you want, their size, and where they’ll sit — whether below the desktop surface or off to one side. Write down every measurement carefully. This blueprint is your roadmap, and a clear plan now prevents costly mistakes later. The more detailed your sketch, the smoother the rest of the build will go.
Step 2: Choose and Purchase Your Wood
Take your measurements to the hardware store and select the right wood for your project. Plywood is a budget-friendly and stable choice for panels, while solid hardwoods like oak, maple, or pine give a more premium look and feel. Make sure the wood is straight and free of major warps or knots that could compromise the build. Many hardware stores will cut large sheets to rough dimensions for you at little to no cost, which saves effort and time back home. Pick up a little extra wood than your plan calls for — having spare material is always better than coming up short mid-build.
Step 3: Cut All Your Pieces
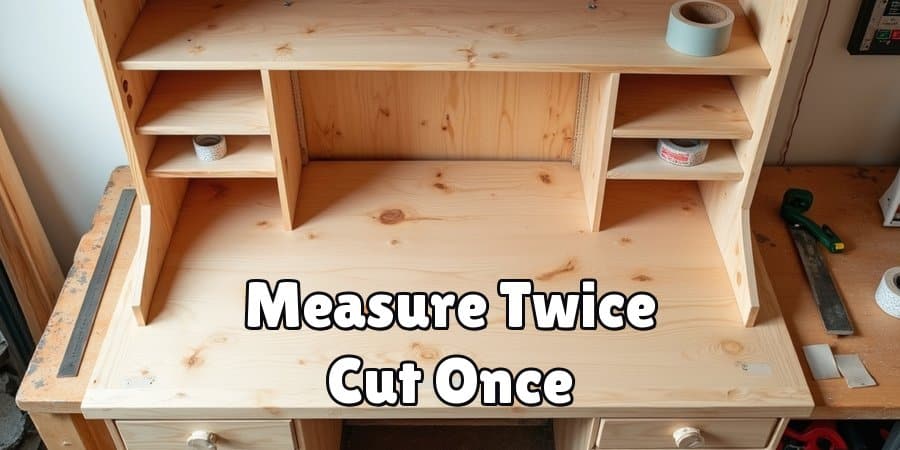
Using your design plan, carefully cut each component: the desktop surface, side panels, back panel, cubby dividers, and shelves. Double-check every measurement before cutting — the old rule “measure twice, cut once” exists for good reason. Use a straight edge or guide rail with your saw to ensure clean, accurate cuts. Label each piece with masking tape and a marker so you know exactly where it goes when assembly begins. Keeping your pieces organized at this stage makes the assembly process far less stressful and far more efficient.
Step 4: Sand All the Pieces
Before putting anything together, sand every surface of every piece. Start with 80-grit sandpaper to remove rough edges and mill marks, then move to 120-grit for a smoother surface, and finish with 220-grit for a silky, even texture. Pay special attention to edges and corners, rounding them slightly so the finished desk looks polished and is safe to the touch. Sanding before assembly is much easier than trying to reach tight spots later. Wipe away all sawdust with a tack cloth or damp rag before moving on to the next step.
Step 5: Build the Main Desk Frame
Start assembling the structural frame of the desk — the two side panels and the bottom base. Apply wood glue along the joints, then secure everything with screws for a strong, lasting hold. Use clamps to hold pieces firmly while the glue dries. Check that all corners are square using a carpenter’s square as you go. A square frame at this stage means your cubbies and desktop will sit straight and level. Let the glue cure for at least 30 minutes before applying stress to the joints. Rushing this step is one of the most common mistakes beginners make, so be patient.
Step 6: Assemble the Cubby Unit
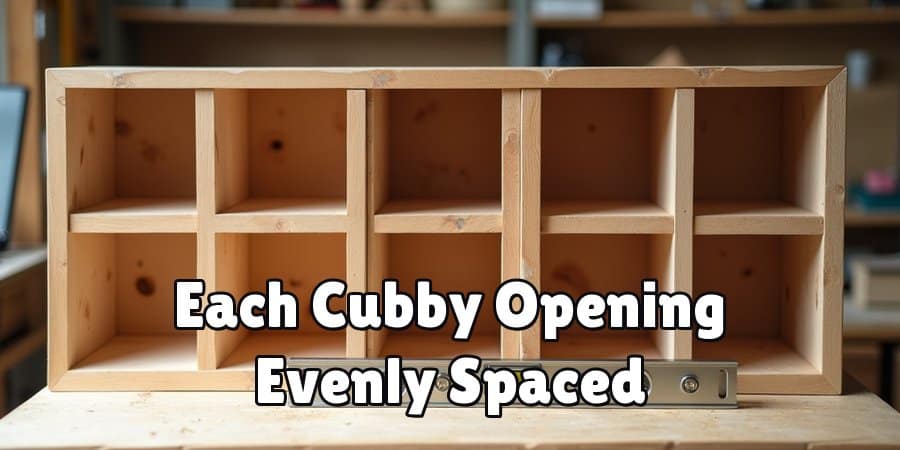
With the main frame in place, begin building the cubby compartments. Attach the vertical and horizontal dividers inside the frame according to your design. Use wood glue and screws or a pocket hole jig for clean, hidden joints. Ensure each cubby opening is even and properly spaced. If you want back panels on your cubbies, cut thin plywood pieces to fit and nail or glue them in place. Stand back and check the overall structure with a level before proceeding. Well-built cubbies are what make this desk stand out, so take your time getting them right.
Step 7: Attach the Back Panel
A back panel adds stability to the entire desk and keeps items in cubbies from slipping through. Cut a piece of 1/4-inch or 1/2-inch plywood to fit the full back of the desk frame. Apply glue and secure it with screws or brad nails all around the perimeter and into any interior dividers it crosses. This panel acts like a backbone, stiffening the desk and preventing any wobble or racking over time. Even if you plan to push the desk against a wall, the back panel adds meaningful structural rigidity that will keep your build solid for years.
Step 8: Install the Desktop Surface
Now it’s time to add the top. Place the desktop panel on top of the assembled frame and align it carefully. You can attach it from below by driving screws up through the frame into the underside of the desktop, keeping the top surface clean and screw-free. Alternatively, use corner brackets on the inside of the frame for extra hold. Make sure the top overhangs evenly on all sides if that’s part of your design, and confirm it’s level before securing it fully. The desktop is the most visible part of the whole piece, so take your time here to get it perfectly aligned.
Step 9: Fill, Sand, and Prime
Inspect every joint and surface for gaps, holes, or slight imperfections. Use wood filler or putty to fill any screw holes, gaps, or blemishes. Let it dry completely, then sand those areas smooth with 120- and 220-grit paper. If you’re painting the desk, apply a coat of primer and let it dry before moving on to your chosen color. If you’re staining, make sure the surface is clean, even, and free of dust. This preparation step is what separates a professional-looking finish from a sloppy one. Don’t rush the drying time between coats — patience here pays off in the final result.
Step 10: Apply Your Finish and Seal the Wood
With your surface prepped and primed, it’s time to apply the final finish. If you’re painting, apply two thin, even coats of your chosen color, allowing full drying time between each. If you’re staining, work the stain in with a brush or rag following the wood grain, wiping away the excess as you go. Once the color is dry, apply two or more coats of polyurethane or varnish to seal and protect the surface. This topcoat guards against scratches, moisture, and daily wear. Let the final coat cure fully — usually 24 to 48 hours — before loading up your new desk with all your gear and putting it to work.

Conclusion
How to build a wooden desk with cubbies is one of the most rewarding home projects you can take on. You end up with a workspace that fits your space exactly, stores your things neatly, and carries the satisfaction of something made by your own hands.
From sketching your design to applying the final coat of finish, every step moves you closer to a piece of furniture that’s built to last.
Don’t let the project intimidate you. With a clear plan, quality materials, the right tools, and a little patience, this is absolutely achievable — even if you’re picking up a saw for the first time. Follow the ten steps, avoid the common mistakes, and take your time at each stage. The result will be a desk you’re proud to use every single day.
