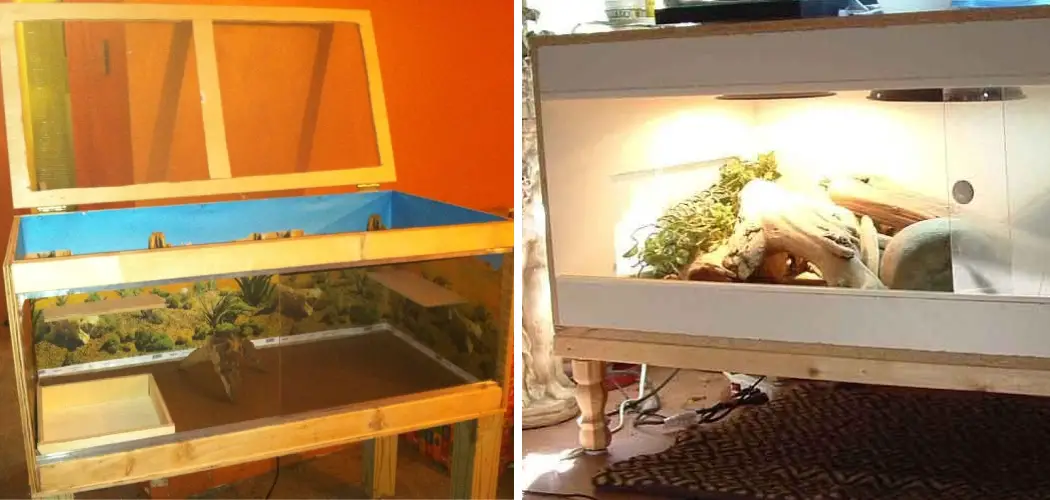
If you’ve ever considered owning a pet reptile, then having a proper enclosure is an essential part of taking care of your new scaly friend. Such enclosures not only provide safety and security for the animal but also create elements that can help stimulate their activity.
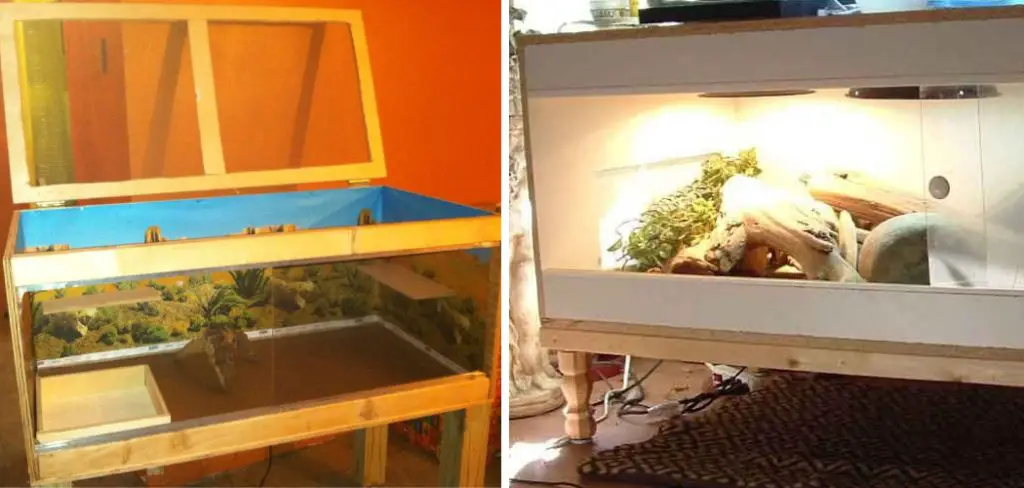
However, all too often, people don’t go beyond buying (or building) a traditional cage for their reptiles – cages with one fixed opening to access what lies inside. Instead, why not take it up a notch and learn how to build a reptile cage with sliding doors!
Not only will this make maintenance easier on you, but it also helps improve ventilation and let more light come into the enclosure – two key elements in keeping any living creature healthy and thriving. Read on to discover all the steps necessary to build your own custom reptile cage, complete with sliding doors!
What Kind of PVC Is Used for Reptile Enclosures?
Reptile cages with sliding doors are typically made using a type of PVC known as Schedule 40. This is a strong, durable, and lightweight material that can be easily cut and drilled to create the enclosure shape required. Additionally, Schedule 40 is designed to withstand harsh temperatures, so it’s perfect for housing reptiles that require different temperature gradients.
To build the reptile cage, PVC pipes, and connectors are used to create the frame. Once the frame is complete, a sheet of Plexiglas or other transparent plastic sheeting can be attached to the top half of the enclosure. Sliding doors can then be added to provide easy access for cleaning and feeding. For additional security, a mesh door may be added over the Plexiglas.
When shopping for PVC, it’s important to make sure that you purchase Schedule 40 pipes and connectors. This will ensure that your reptile enclosure is strong and durable enough to house your pet. Additionally, there are many different sizes of PVC pipe available, so you can be to find the right size for your reptile.

Is PVC Material Fire Resistant?
When it comes to building a reptile cage with sliding doors, you may be wondering if PVC material is safe to use. After all, it is a synthetic plastic-like material that is both lightweight and easy to work with. The good news is that PVC can be used safely since it is fire-resistant. This makes it an ideal choice for a reptile cage, as the chances of your cage catching on fire are drastically reduced.
PVC contains materials like chlorine, carbon and hydrogen, which make it an extremely fire-resistant material. In fact, a study conducted by the National Institute of Standards and Technology (NIST) found that PVC had better fire resistance than other materials like wood, drywall and fiberglass.
When using PVC in your reptile cage, you should still take precautions to ensure maximum safety. For instance, you should avoid using any materials that are flammable near your cage, such as carpeting or fabric. You should also ensure that the electrical wiring in your cage complies with safety standards and is inspected regularly by a professional.
In conclusion, PVC is an excellent material to use for building a reptile cage with sliding doors, as it is fire-resistant and lightweight. However, you should still take extra precautions to ensure the safety of your cage. By following these tips, you can rest assured that your reptile cage will be safe from any potential fires.
10 Methods on How to Build a Reptile Cage with Sliding Doors
1. Gather the Proper Materials
In order to build a reptile cage with sliding doors, you will need the following materials: plywood, plexiglass, screws, hinges, a drill, a saw, and silicone sealant. Make sure that all of the materials you use are non-toxic and safe for your reptile.
If you are unsure of what materials to use, consult with a local reptile expert. However, the plywood should be untreated and unpainted. Try to purchase a sheet of plywood large enough to accommodate the size of your reptile’s cage.

2. Cut the Pieces for the Cage
Using the saw, cut the plywood into pieces that will serve as the sides, top, and bottom of the cage. The dimensions of the cage will depend on the size of your reptile. Make sure to cut the pieces large enough for your reptile to move around comfortably.
While cutting, make sure the edges of the plywood are smooth so that no sharp edges remain. Once the pieces have been cut to size, use the sandpaper to round out any sharp edges. This will help prevent your reptile from getting injured on the cage walls.
3. Assemble the Cage
Using screws and hinges, assemble the sides, top, and bottom of the cage so that it forms a rectangle. Make sure that the hinges are positioned so that the doors can be easily added later. If one of the sides is longer than the other, make sure to attach it first. Attach the top and bottom pieces last. If you are unsure about any of the measurements or steps, refer to your pre-measured plans for guidance. However, make that you can still easily add doors in later.
4. Cut the Pieces for the Doors
Using the plexiglass, cut two rectangles that will serve as doors for the cage. The dimensions of these rectangles should be slightly smaller than the openings of the cage. To make it easier to slide the doors into their respective openings, you should use a router or jigsaw to make beveled edges on the sides of the doors.
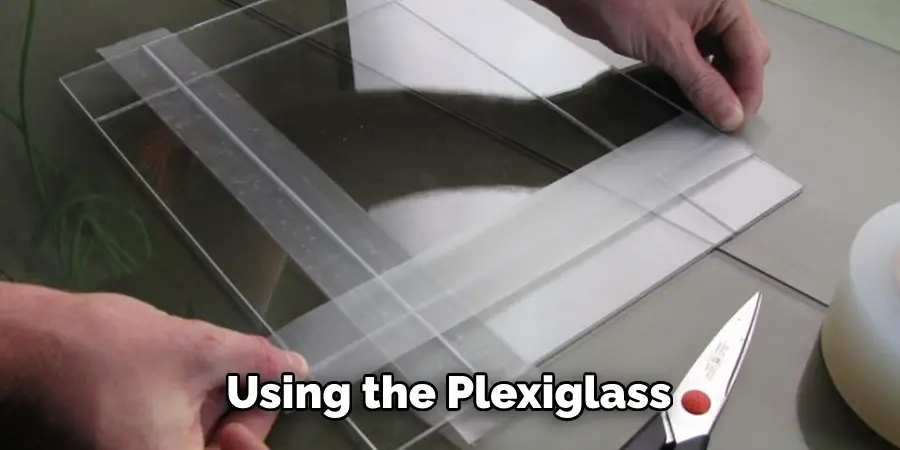
This will allow them to slide more easily. While cutting the doors, you should also cut two smaller rectangles that will fit snugly within the walls of the cage. These will act as door stops, preventing the doors from sliding out of the cage.
5. Attach the Doors to the Cage
Using screws, attach the doors to the cage so that they can slide open and closed. Make sure that the doors are securely attached and that there is no gap between them and the frame of the cage.
Place two screws at the top and two screws at the bottom of each door. Finally, attach a latch or hook to each side of the doors so they can be closed securely. If desired, you can also paint or decorate the doors to make them match the overall look of your cage. Congratulations, your reptile cage with sliding doors is now complete!
6. Seal any Gaps
Using silicone sealant, seal any gaps between the doors and frame of the cage. This will help to prevent escapees! If you have used a mesh lid, use the silicone sealant to also ensure that it’s secure. Make sure to leave the sealant to dry completely before you introduce your reptile.

7. Add Your Reptile!
Now that your cage is complete, it’s time to add your reptile friend. Place some substrate (such as sand or soil) in the bottom of the cage, along with some hiding places and plants or other decorations. Then, add your reptile and watch them enjoy their new home!
8. Clean the Cage Regularly
It is important to clean your reptile cage regularly to prevent any bacteria or parasites from growing. Use a mild soap and water solution, and make sure to dry out the cage completely before putting your pet back in. While cleaning, you can also inspect the cage for any areas that may need repairs or adjustments. Doing this regularly will ensure a healthy and safe environment for your pet.
9. Monitor Reptile
Finally, it is important to keep an eye on your reptile. Make sure they are eating and shedding properly and that they are healthy overall. If you notice any issues, check with your vet to make sure that all is well. The reptile cage should not be used as the only form of monitoring – you should also observe your reptile’s behavior and general activity level. ‘
10. Replace Any Damaged Parts
If any parts of the cage become damaged, you should replace them as soon as possible ensure your reptile’s safety and comfort. You should inspect the cage regularly to check for signs of wear or damage, such as chipped paint or cracks in the plastic. You can buy replacement parts at your local pet store or online.
Conclusion
Building your own customized reptile cage with sliding doors is a great way to show your pet how much you care. Not only can you save money and guarantee the safety of your pet, but you can also make sure that the enclosure meets all of its needs in terms of space and temperature.
With just a few materials and some simple steps, you’ll soon have your own reptile cage up and running! We hope this guide has shown you how to build a reptile cage with sliding doors. Have fun and enjoy watching your pet thrive in its new home!
If you still need any help or advice with building a reptile nest, don’t forget to reach out to professionals who have plenty of experience with constructing cages. Good luck, be creative when it comes to building your dream habitat – and don’t forget to add those sliding doors!
You Can Check It Out to Secure Exterior Sliding Barn Doors

