

Your dining room table is more than just a place to eat. It’s the heart of your home, where family gathers, friends laugh, and memories take shape over shared meals. A beautifully decorated table can turn an ordinary dinner into something special and make your whole room feel warm and welcoming.
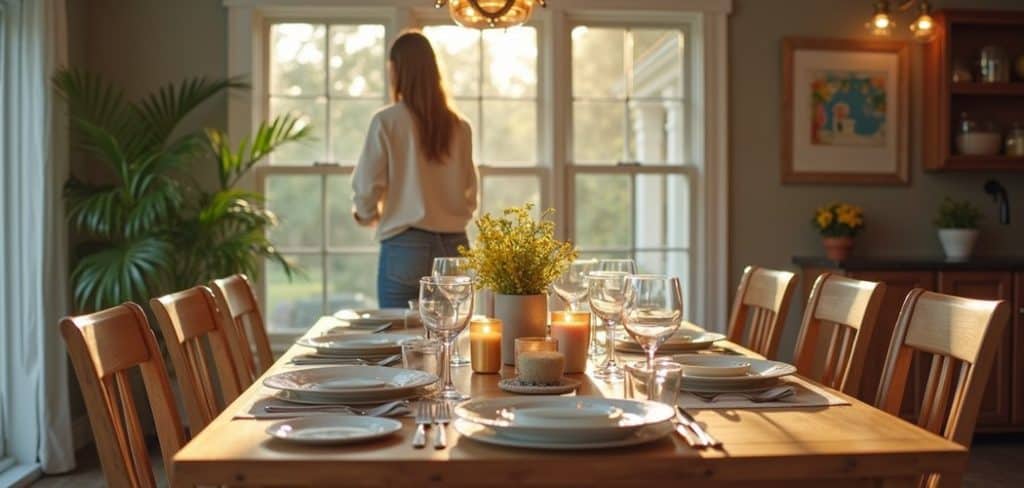
The good news? You don’t need a professional decorator or a huge budget to create a stunning tablescape. With a few thoughtful touches, some creativity, and a little know-how, you can transform your dining table into a showpiece that reflects your personal style.
Whether you’re preparing for a holiday feast, a casual weekend brunch, or you simply want your everyday setting to feel more inviting, this guide has you covered. We’ll walk you through the benefits, the supplies you’ll need, and ten easy steps to help you decorate like a pro. Let’s dive into how to decorate a dining room table.
What are the Benefits?
Decorating your dining room table brings a surprising number of perks that go beyond good looks. Here’s why it’s worth the effort.

- It sets the mood. A well-styled table instantly creates atmosphere. Soft candlelight and fresh flowers signal that a meal is meant to be savored, not rushed. Your guests feel special before they even take a seat.
- It shows off your personality. The colors, textures, and pieces you choose tell a story about who you are. A decorated table gives you a chance to express your taste, whether that’s rustic charm, modern minimalism, or bold and colorful fun.
- It elevates everyday meals. You don’t have to save your best efforts for holidays. A simple centerpiece or a pretty runner can make Tuesday night dinner feel like a treat. This small habit adds joy to daily life.
- It impresses guests. When people walk into a room with a thoughtfully arranged table, they notice. It shows care and attention, making your hosting feel polished and intentional.
- It encourages connection. A beautiful setting invites people to sit, stay, and linger. Meals become slower and more meaningful when the space feels warm and cared for.
- It’s budget-friendly fun. Decorating a table lets you get creative without spending much. You can reuse items you already own and swap things around with the seasons.
What Will You Need?
Before you begin, gather your supplies so everything is within reach. You may not need every item on this list, but it’s helpful to have options. Here’s what typically comes in handy:
Having these items ready will make the process smooth and enjoyable. Now let’s move on to the fun part.
- A table runner or tablecloth to set the base and protect the surface
- Placemats and napkins for structure and texture
- A centerpiece such as flowers, a bowl, candles, or greenery
- Candles and candle holders for warmth and glow
- Vases of various sizes for flowers or branches
- Fresh or faux flowers and greenery to add life and color
- Dinnerware including plates, bowls, and chargers
- Glassware for water and drinks
- Flatware neatly polished
- Cloth or paper napkins with rings if you like
- Decorative accents like small figurines, candles, or seasonal items
- A tray or wooden board to anchor your centerpiece
- Natural elements such as pinecones, fruit, or stones for texture
10 Easy Steps on How to Decorate a Dining Room Table
Step 1: Clear and Clean Your Table
Start with a blank canvas. Remove everything from your table, including any clutter, mail, or leftover items. Wipe the surface down thoroughly so it shines. This simple step matters more than you might think. A clean, empty table lets you see the space clearly and plan your design without distraction. It also protects your decor from dust and crumbs. Take a moment to appreciate the fresh starting point. A tidy surface makes every element you add look more intentional and polished. Trust us, this small effort pays off in the final result.
Step 2: Choose a Theme or Color Scheme
Decide on the overall look you want before adding anything. Are you going for cozy and rustic, bright and cheerful, or elegant and refined? Pick a color palette of two or three shades that work well together. For example, soft neutrals with a pop of green feel fresh and calming. Warm oranges and deep reds suit autumn beautifully. Having a clear theme keeps your table from looking random or cluttered. It also guides every choice you make, from napkins to flowers. When your colors and mood match, the whole table feels pulled together and thoughtful.
Step 3: Lay Down Your Base Layer
Now build the foundation. Start with a tablecloth or table runner. A tablecloth covers the whole surface and creates a soft, formal feel. A runner, which stretches down the center, offers a more relaxed and modern look while still adding texture. Choose a color and material that fits your theme. Linen feels natural and casual, while satin or velvet adds elegance. This base layer anchors your entire design and protects your table from spills and scratches. Smooth out any wrinkles so the fabric lies flat. A crisp, clean base instantly makes the rest of your decor pop.

Step 4: Add Placemats and Chargers
Place a placemat or charger at each seat. These define individual settings and add another layer of texture and color. Chargers are large decorative plates that sit under your dinnerware, giving the table a refined, restaurant-quality feel. Placemats work well for casual settings and come in endless materials like woven fibers, cork, or fabric. Space them evenly around the table so each guest has a defined spot. This step creates order and balance. It also helps guide your eye across the table, making the whole arrangement look neat and welcoming for everyone who sits down.
Step 5: Set Your Dinnerware
Stack your plates neatly at each place setting. Start with the largest plate on the bottom, then add smaller plates or bowls on top. If you have salad plates or soup bowls, layer them according to how you’ll serve the meal. Choose dinnerware that complements your color scheme. White plates are versatile and let your other decor shine, while patterned or colored plates make a bolder statement. Make sure everything is clean and free of chips. Well-arranged dinnerware forms the core of your table setting and shows guests exactly where to sit and settle in.
Step 6: Arrange Your Flatware and Glassware
Place forks on the left of the plate and knives and spoons on the right, with the knife blade facing inward. If you’re serving multiple courses, arrange the utensils in the order they’ll be used, from outside to inside. Set glasses above the knife on the right side. Add a water glass and any wine or drink glasses your meal calls for. Polish everything so it sparkles under the light. Proper placement feels elegant and functional. Even a casual setting looks put-together when the flatware and glassware are neatly arranged. This attention to detail always impresses.
Step 7: Create a Stunning Centerpiece
The centerpiece is the star of your table. Choose something that reflects your theme, like a vase of fresh flowers, a cluster of candles, or a bowl of seasonal fruit. Keep it low enough that guests can see and talk over it easily. If you want height, use tall, thin candlesticks or slender vases that don’t block sightlines. Place your centerpiece in the middle of the table, or run a series of smaller items down the center for a runner-style effect. A beautiful centerpiece draws the eye and gives your table a clear focal point that ties everything together.

Step 8: Fold and Place Your Napkins
Napkins add color, texture, and a touch of elegance. Fold them in a style that suits your look, from a simple rectangle to a fancy fan or knot. Place each napkin on the plate, to the left of the forks, or tuck it into a napkin ring for a polished feel. Cloth napkins feel luxurious and reusable, while quality paper napkins work for casual meals. Pick a color that complements or gently contrasts with your scheme. This small touch shows care and completes each individual place setting. Guests notice these thoughtful details the moment they sit down.
Step 9: Add Candles and Lighting
Lighting sets the mood like nothing else. Add candles to bring warmth and a soft, flattering glow to your table. Use taper candles in holders for elegance, or scatter tea lights and votives for a cozy feel. Battery-operated candles work well if you prefer a flame-free option or have children around. Arrange them safely, away from anything that could catch fire. The gentle flicker of candlelight makes food look more appetizing and conversation feel more intimate. Dim the overhead lights slightly to let your candles shine. This step transforms an ordinary table into a magical, inviting space.
Step 10: Add Final Touches and Personal Details
Now step back and see what your table needs. Add small finishing touches like sprigs of greenery, scattered petals, place cards, or seasonal accents. A few natural elements such as pinecones, acorns, or citrus slices add charm and texture. Personal details, like handwritten name cards or a small gift at each seat, make guests feel truly welcome. Be careful not to overcrowd the table, though. Leave enough open space for plates, serving dishes, and elbows. Once everything feels balanced and beautiful, you’re done. Enjoy your gorgeous, thoughtfully decorated dining room table.
5 Things You Should Avoid
Even with the best intentions, a few common mistakes can spoil your beautiful table. Keep these pitfalls in mind.
1. Overcrowding the table. It’s tempting to add every pretty item you own, but too much clutter looks messy and leaves no room for food or plates. Choose a few standout pieces and give them space to shine.
2. Blocking sightlines. A tall centerpiece might look impressive, but if guests can’t see each other across the table, conversation suffers. Keep decor low or use slim, tall pieces that don’t obstruct the view.
3. Ignoring the color scheme. Mixing too many clashing colors makes your table feel chaotic. Stick to a simple palette so everything feels cohesive and calming.
4. Forgetting function. Decoration should never get in the way of dining. Make sure guests have enough room to eat comfortably and reach what they need without knocking things over.
5. Using strong scents. Heavily scented candles or flowers can compete with the aroma of your food. Choose unscented candles and mild flowers so the meal remains the main event.

Conclusion
How to decorate a dining room table is one of the easiest and most rewarding ways to bring warmth and personality into your home. With just a little planning and a few thoughtful touches, you can transform an ordinary surface into a beautiful setting that welcomes family and friends alike.
Remember to start with a clean base, pick a theme you love, and build your table layer by layer. Keep balance and function in mind, avoid common mistakes, and don’t be afraid to let your creativity shine. The best tables reflect the people who gather around them, so make yours truly your own.
Now it’s your turn. Gather your supplies, follow these ten easy steps, and enjoy the process of creating something special. Your beautifully decorated dining room table is waiting to become the heart of your next gathering. Happy decorating!
